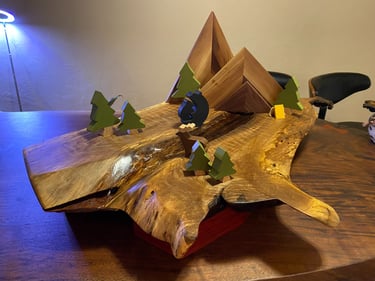
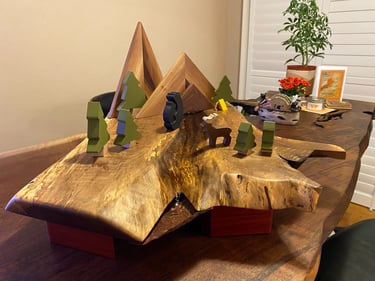
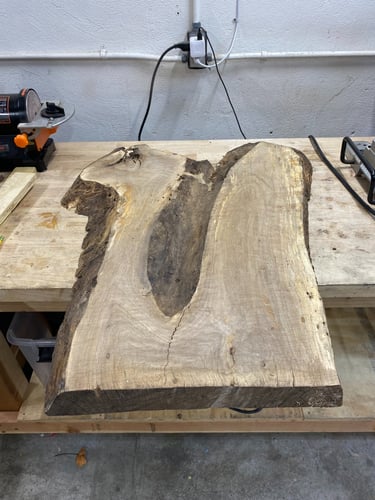
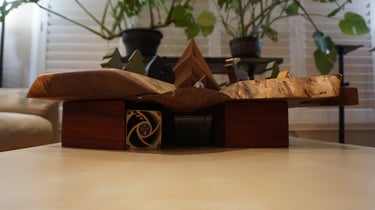
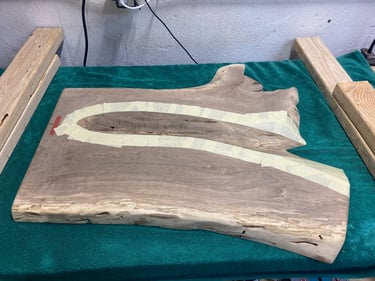
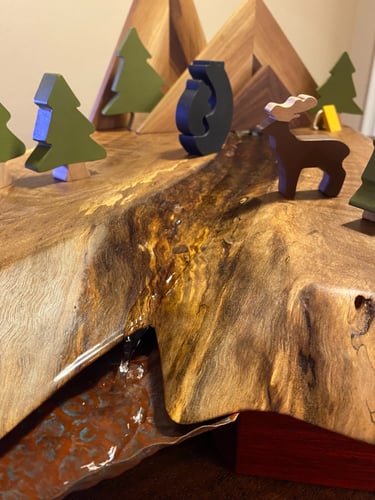
Alaskan River Slab
November, 2022 - April, 2023
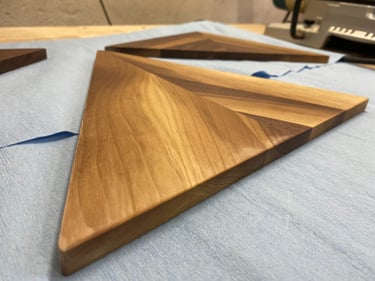
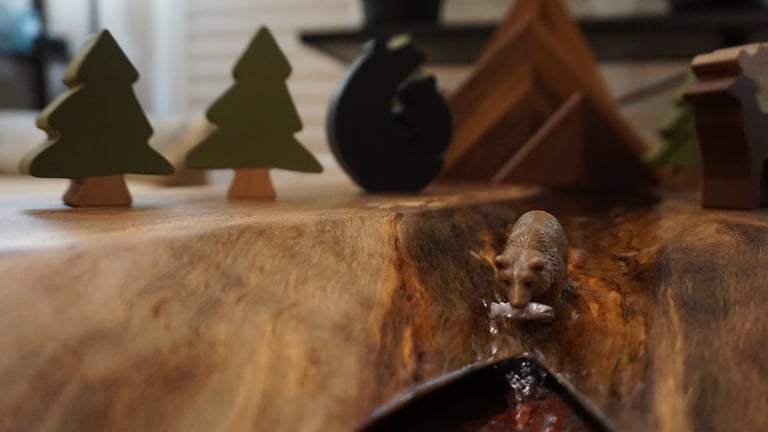
This project was a Christmas gift for my girlfriend at the time, and inspired by a backpacking trip to Denali National Park. If you have read my post on the Walnut Dining Table you know that I am against using epoxy in the slab world. This piece takes "river table" to the next level by incorporating real flowing water. Animal figurines finished with chalk paint add a playful look to complete the set.
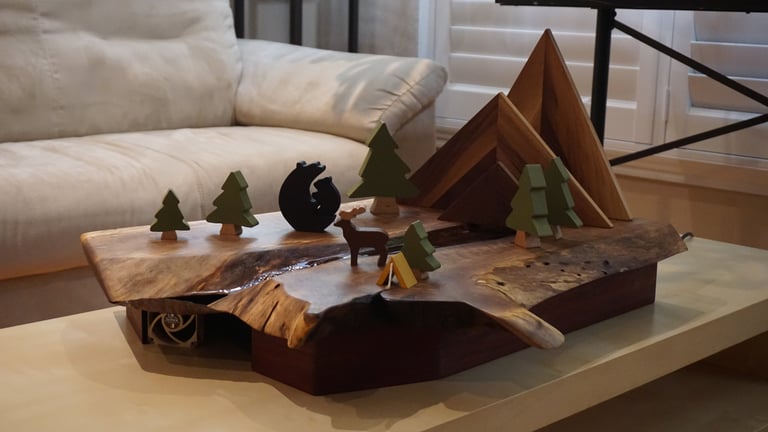
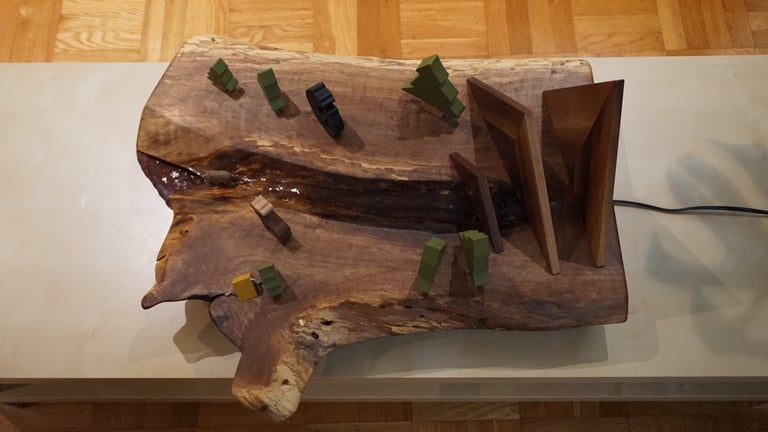
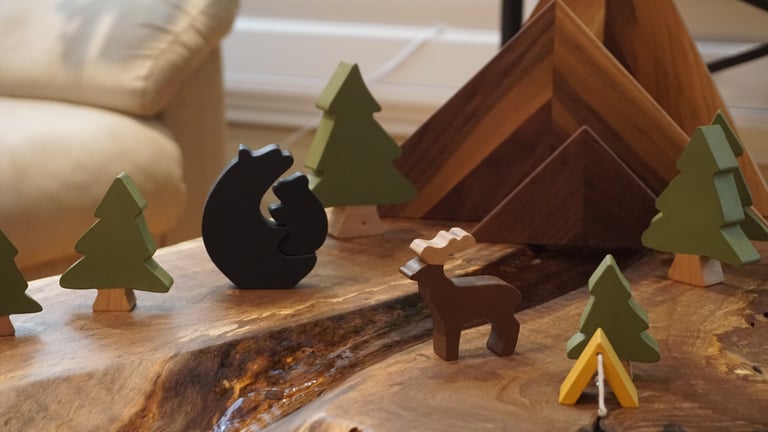
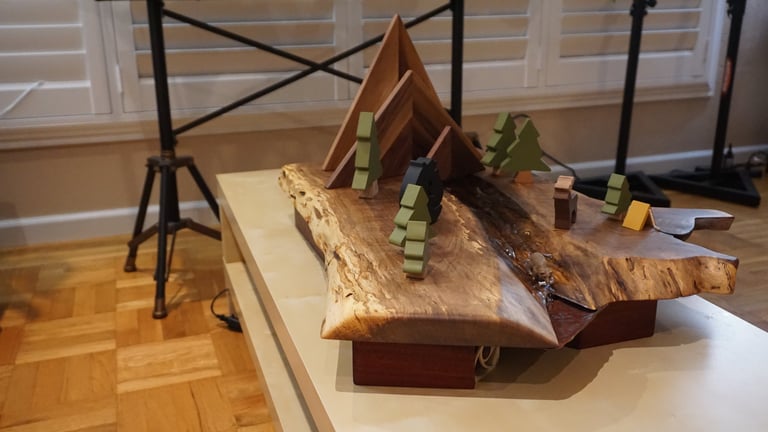
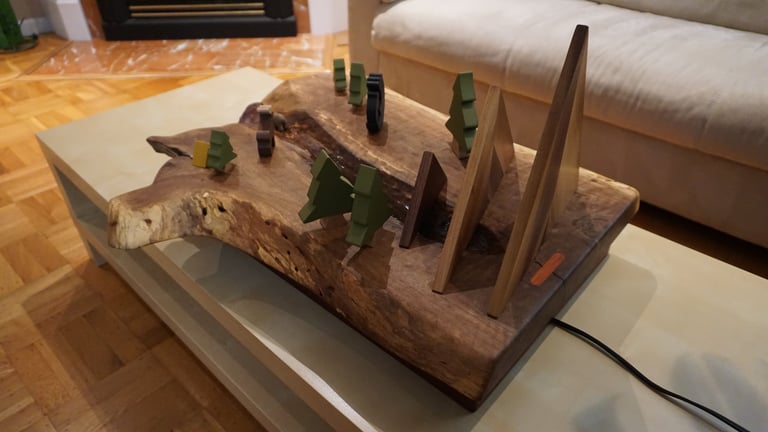
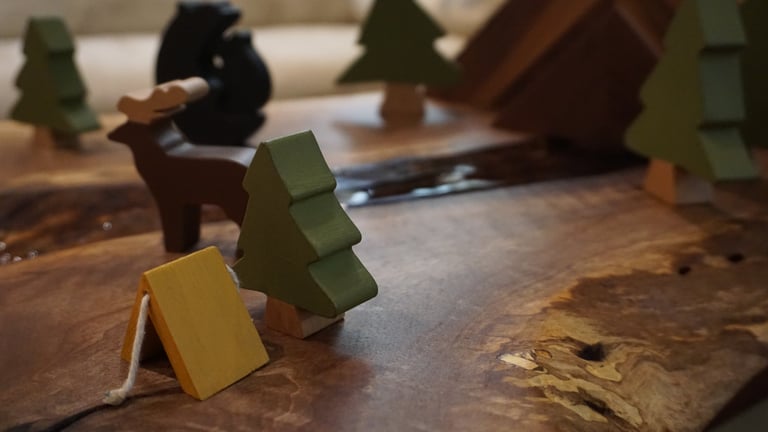
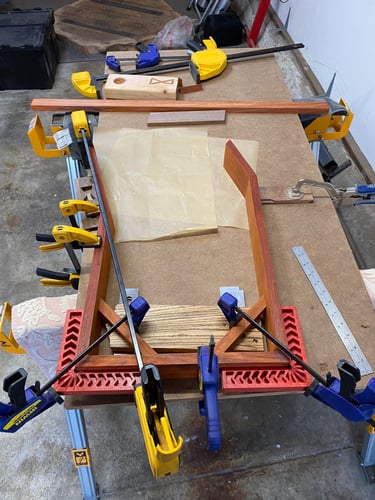
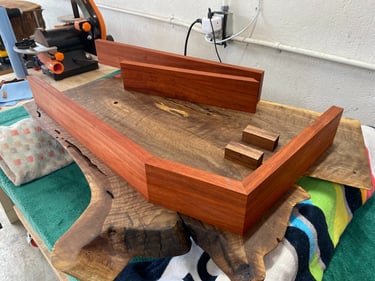
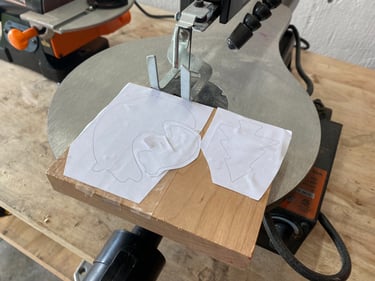
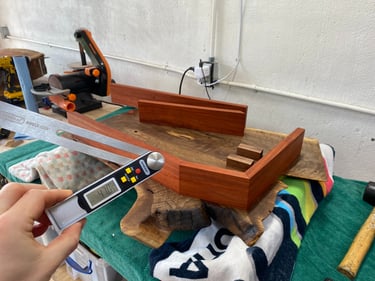
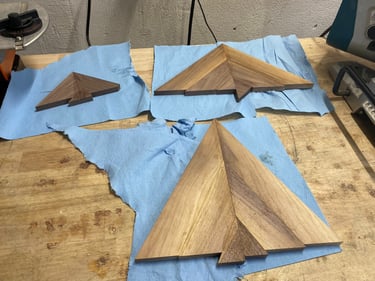
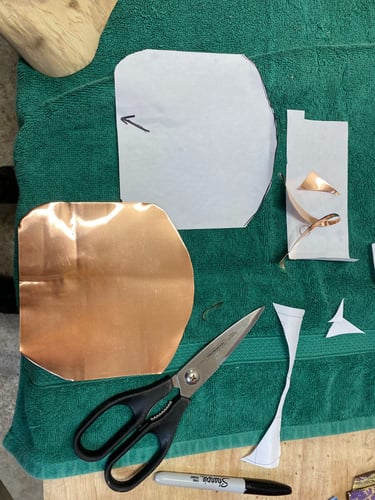
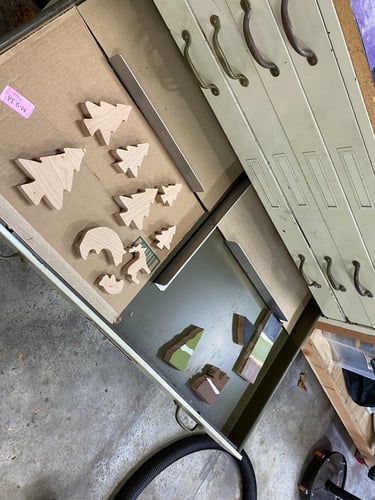
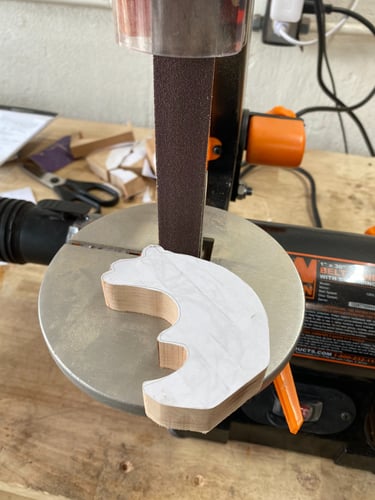
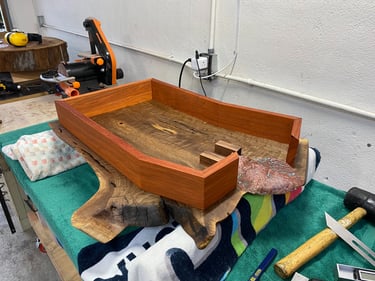
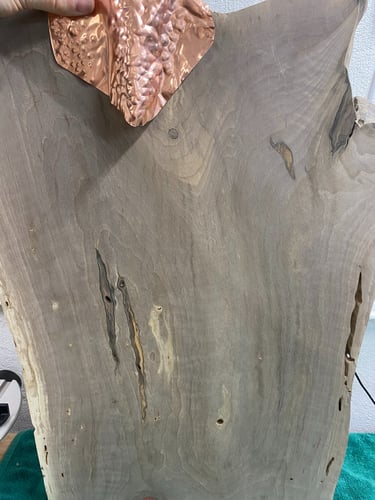
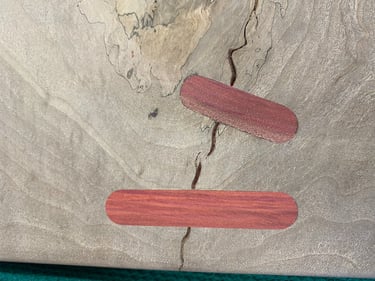
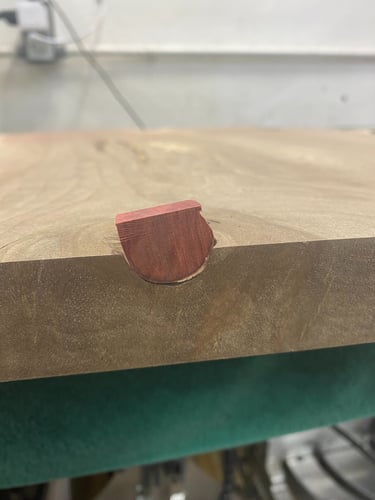
Woods Used: English walnut slab with paduk base, cherry figurines, walnut mountains
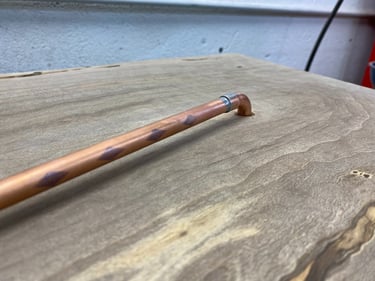
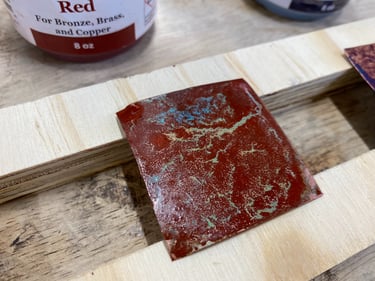
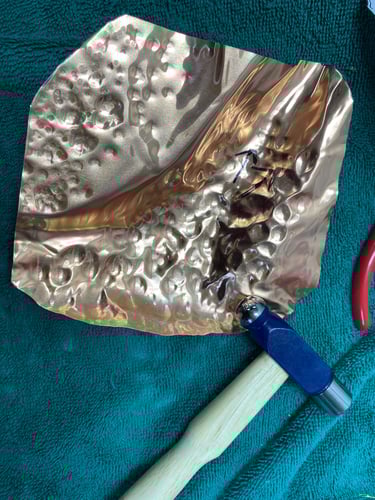
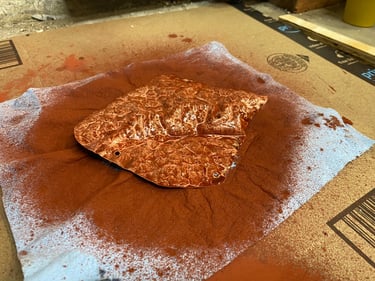
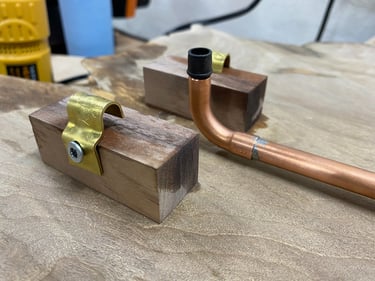
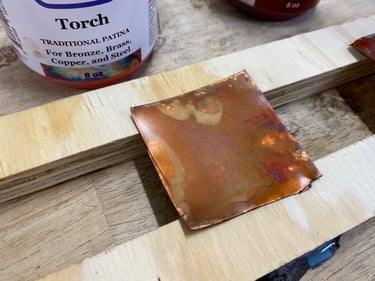
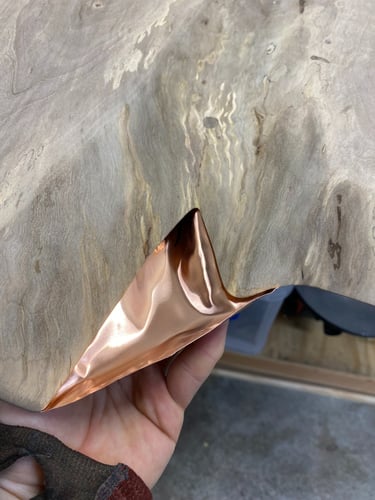
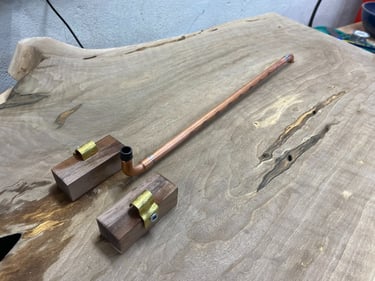
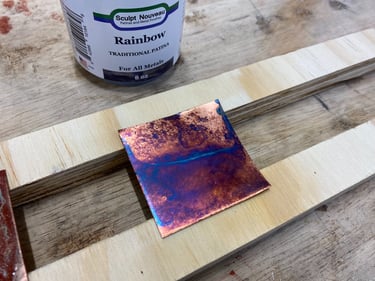
Fountain System: Aquarium pump with copper pipe (soldered), ballpeen textured copper funnel with patina finish
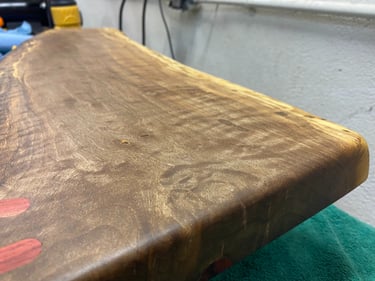
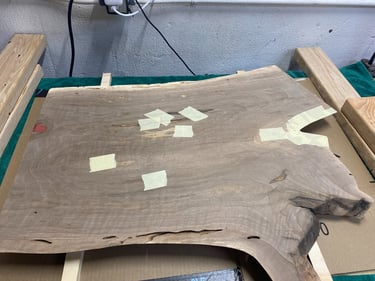
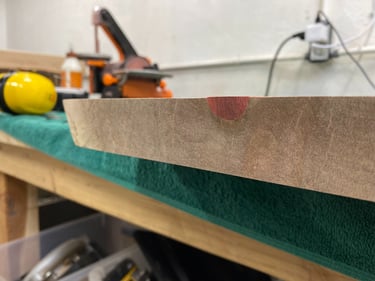
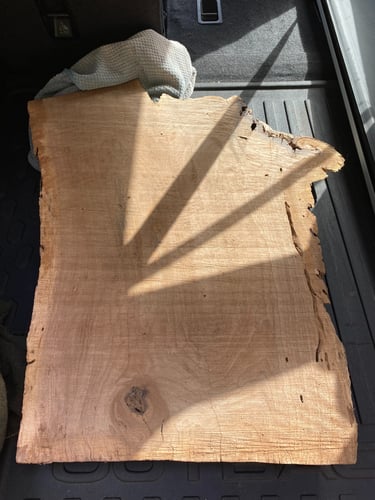
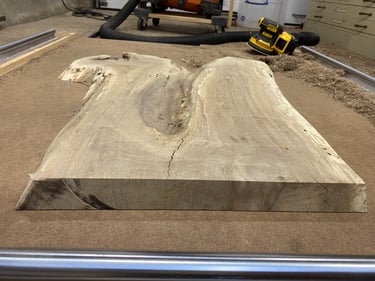
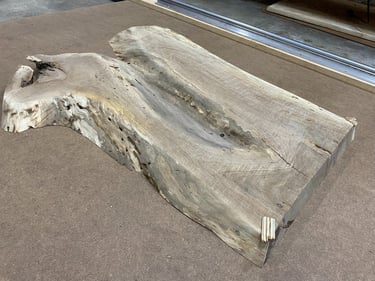
Slab Size: Approximately 22x26.5in
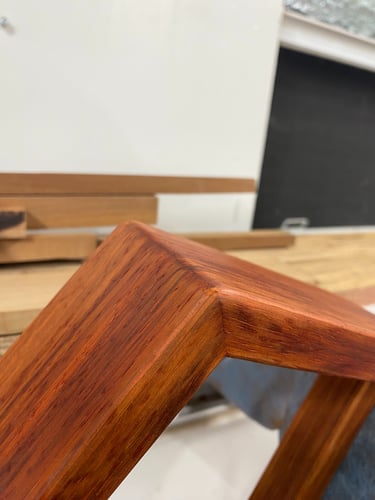
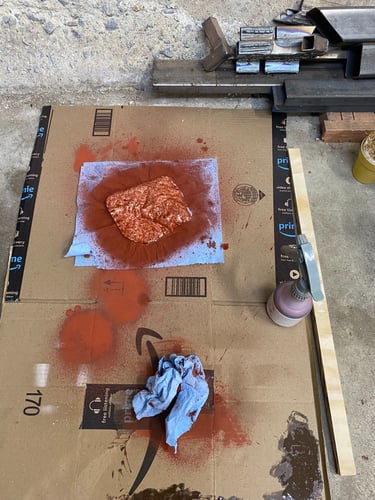
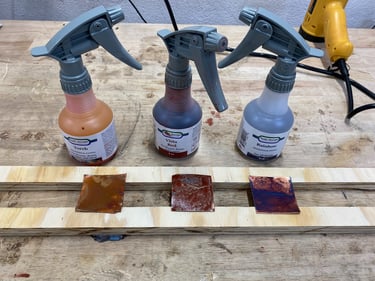
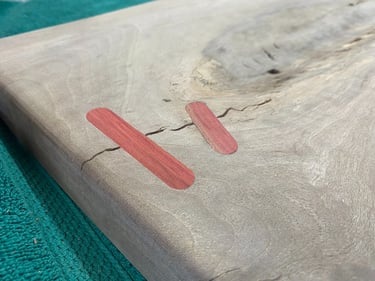
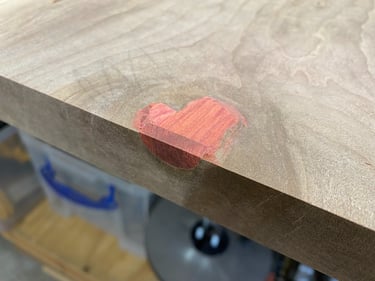
Finish: 220grit followed by hardwax oil (Rubio Monocoat) and ceramic top coat (Black Forrest), figurines painted with chalk paint
Project Challenges and Lessons Learned:
This has been my most "artsy" project to date. There was not as much upfront planning as I normally would do. I started with the figurines and knew there needed to be a home for them - but I was running out of time before Christmas. I brainstormed but struggled to envision the final look. I had some ideas (not involving rivers yet) but not enough time to execute. With Christmas approaching, I kept trying to make compromises for the worse. I wanted something I could be proud of so I pumped the brakes and turned the project into a two part gift. I am glad I did this.
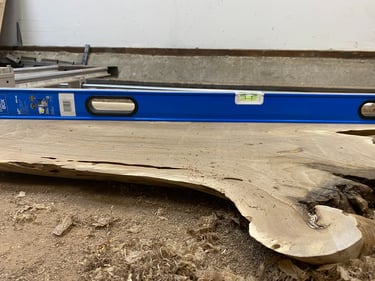
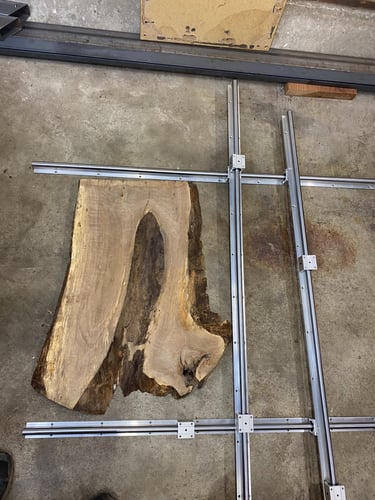
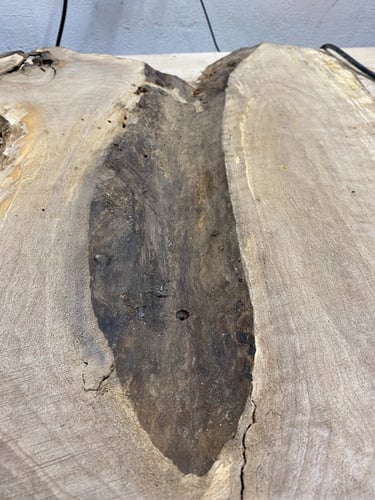
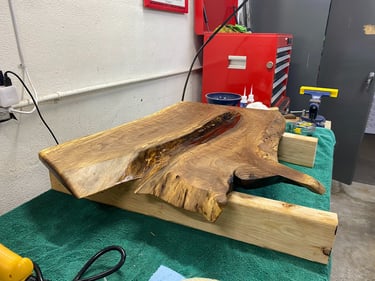
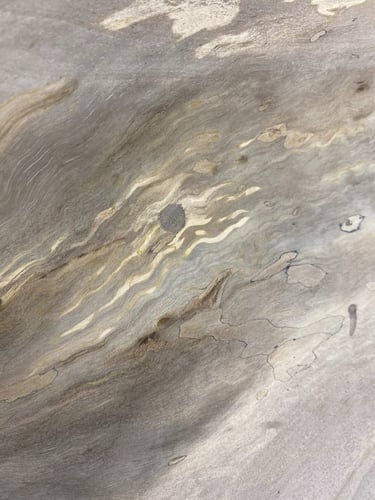
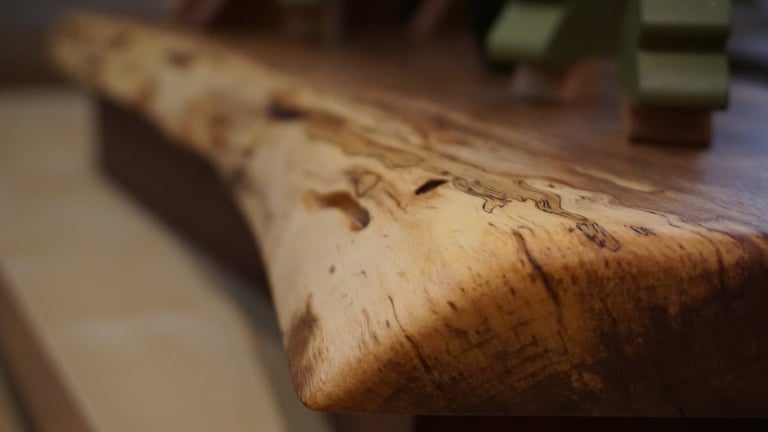
To be perfectly honest, I did not set out on a quest to find a slab with specific characteristics. I was really just looking for a high quality slab in the right size. When I found this one with a natural cutout I said to myself, "Hey, that looks like it could become a river!" This was not planned but when I saw the slab a lightbulb turned on, and I went for it. Consistent with my other slab work, I believe there is real value in highlighting or utilizing natural features of wood. It was perfect for the project so I grabbed it and the challenge was on. All of this to say...take your time and do it right.
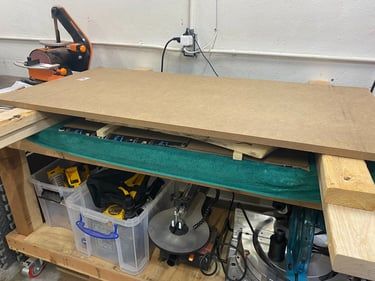
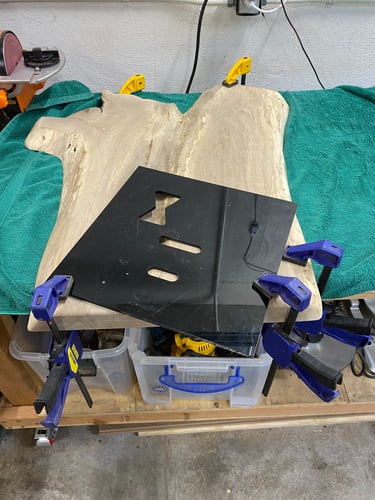
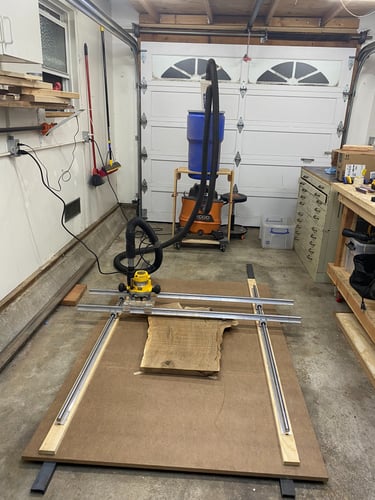
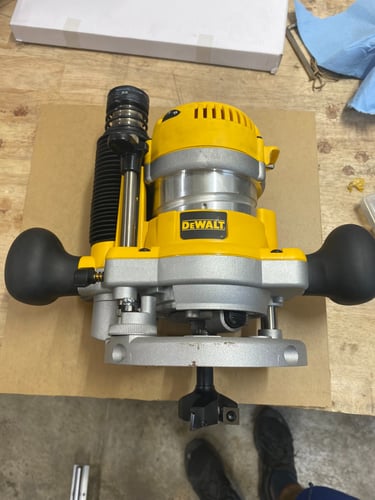
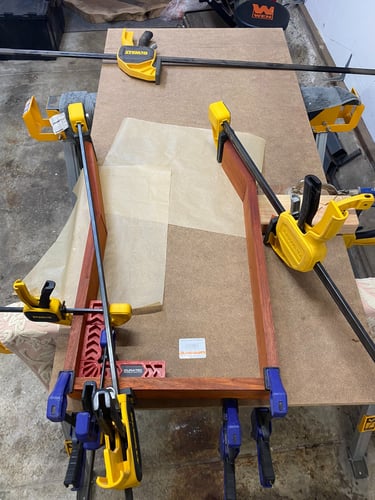
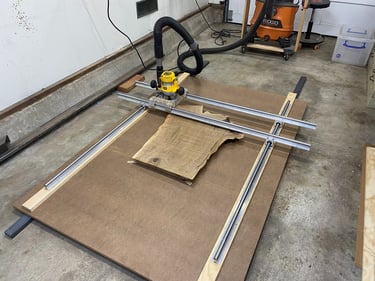
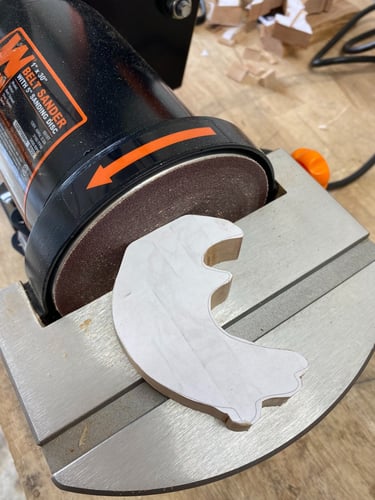
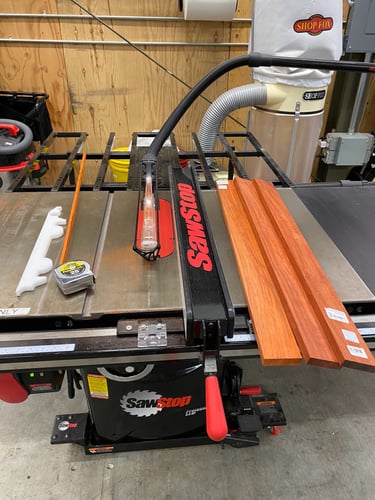
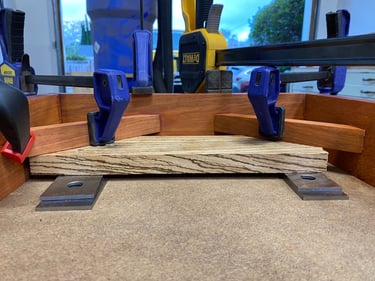
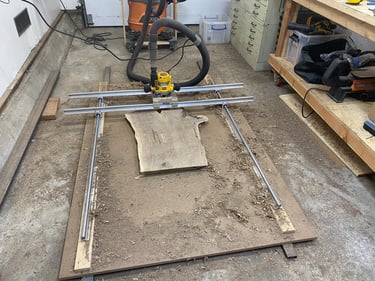
For the slab cleanup and shaping, things generally went well. I have had mixed success getting slabs flattened by others so I decided to give it a shot myself. This was the first time flattening a slab, and it went surprisingly perfect first try. I created a gantry system out of linear rail and threw on my Dewalt hand router with a 3in flattening bit (scary!) to a custom router base I made. MDF is very flat (relative to wood working tolerances) and provided a good reference base. I needed to do a little shim work on the garage floor but it was not too bad. I gave the slab a few passes on both faces and it was good to go. I will be using this technique on all of my smaller slab projects moving forward.
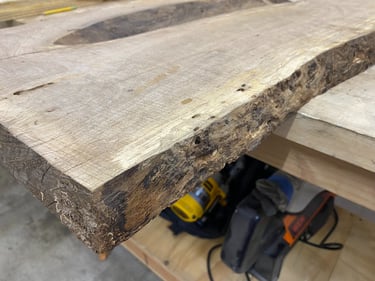
I did a really thorough job sanding this slab. In all of my research and practice so far, I think one of the biggest levers you have is the quality of the sand paper itself. Pick up some proper 3M Cubitron - it is worth the investment. Consistent pressure and a good dust vacuum are also important. Use a light pencil marking on your sanding surface to ensure everything is being sanded down evenly. Take multiple passes at the same grit if necessary to remove blemishes and scratch marks. Do not skip a grit number. There are plenty of articles and YouTube videos on this stuff, I am not reinventing the wheel. But this project was proof that good sanding technique pays off. This was my best finish yet.
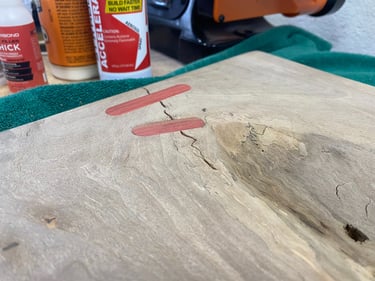
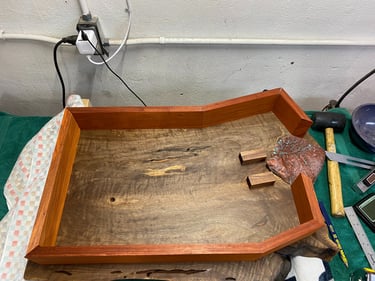
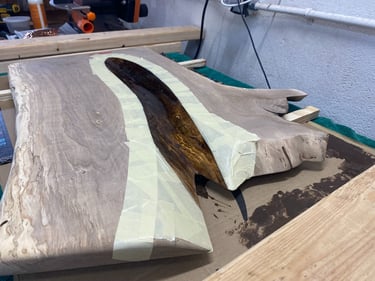
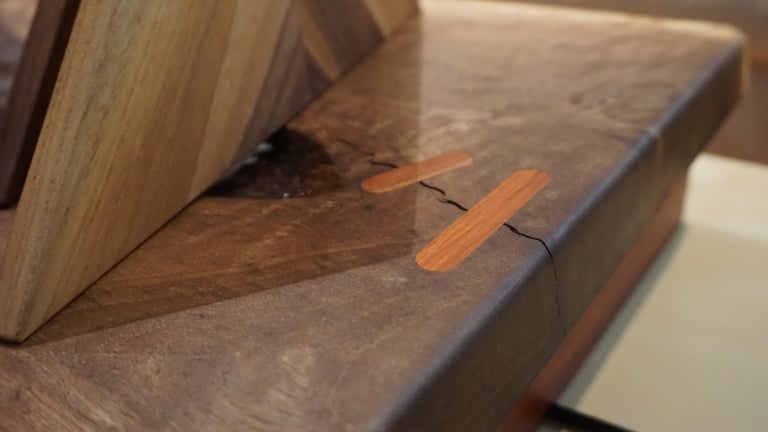
Lastly, the river. We all know that water + wood = bad. You can get swelling, warping, and mold growth. This was scary - I would hate to see this thing turn into a potato chip. I must confess, this was the one time I have used epoxy resin as I could not come up with another way to protect the wood. Initially, I only applied resin to the riverbed area, with the rest of the slab finished in oil. I also fed the copper pipe directly through the slab without a proper seal. After a few weeks I noticed some slab movement. It was not catastrophic but gave me anxiety. I drained everything, let it dry, and after about a week the slab returned to its neutral position. The movement was minimal but worsened over time so I stopped, let it dry out again, and brainstormed design improvements. I had two theories.
The first theory was simply water ingress. There were a few points along the river bed where the epoxy seal could have been improved, especially around the copper pipe going into the slab. There was also a chance of water clinging to the bottom surface as it flowed into the funnel. The second theory was a build up of humidity underneath the slab since the tub of water was below.
To reduce the change of water ingress I improved the epoxy sealing on the river bed with a second layer, paying close attention to any holes or cracks I may have missed the first time. I also applied a thin layer of epoxy just underneath the funnel on the bottom side. For theory two I purchased an "ultra quiet" 12V gaming computer fan and positioned it near the water tub right at the funnel point. This would extract any water vapor before it has a chance to absorb into the slab. It is a little more noisy then the aquarium pump but still completely reasonable.
I am happy to report that testing results look promising so far. There has been no movement after a week of usage. Before there was obvious movement after 24 hours.
I continue to report that after a month of usage there continues to not be any further movement. I think this problem is solved.
Technical Details