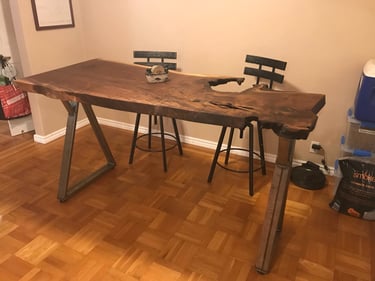
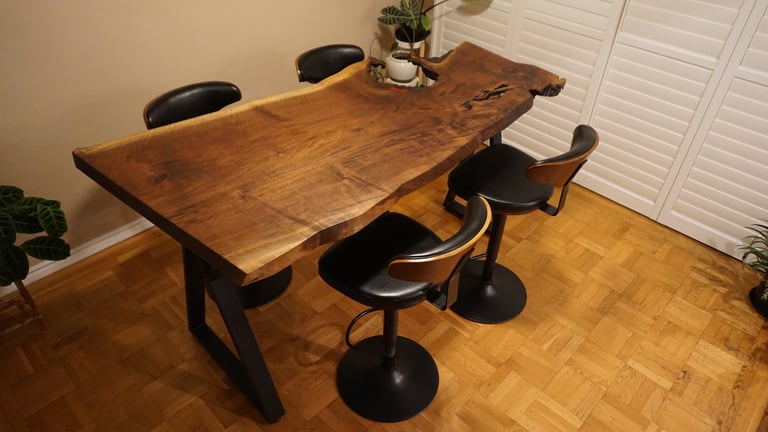
Black Walnut Dining Table
November, 2021 - June, 2022
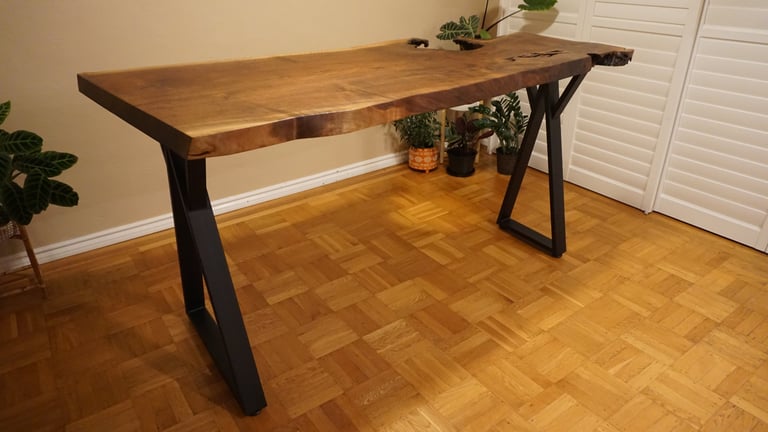
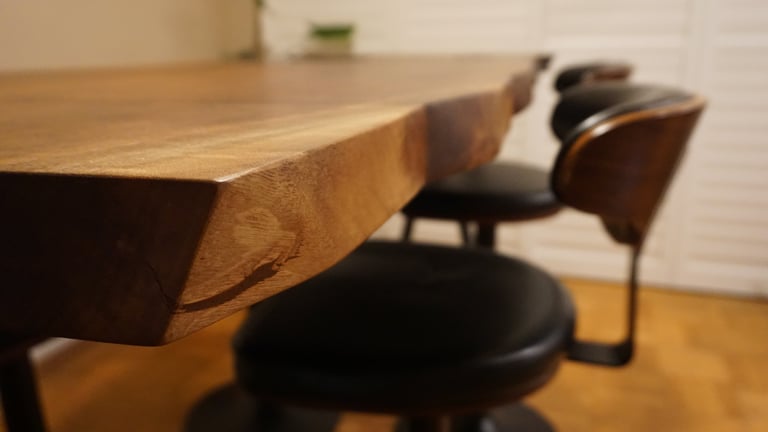
The actual need for a dining room table was the perfect excuse to kick off this project. It featured several firsts for me - my first slab work, my first welding project, and my first inlay. Designed at a comfortable standing height, this table can function as a standing table or be paired with barstools for seating, making it ideal for both dinners and parties. The black powder coated steel legs complement the classic oil finished black walnut top for a modern look. The big controversy for this project was epoxy or no epoxy...more details on that in the technical section.
A shoutout to Peter Verdone for assisting with the design review and fabrication of the legs.
I also owe a lot of credit to Cam from Blacktail Studio as the majority of my learning came from his YouTube channel.

Technical Details
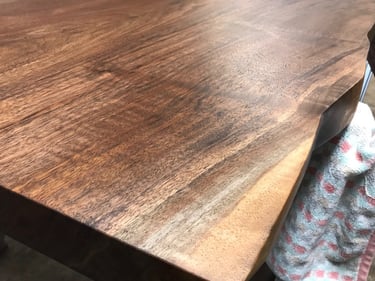
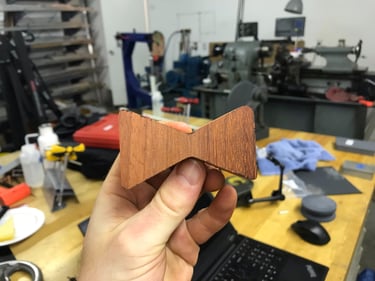
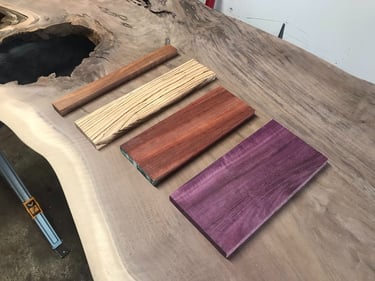
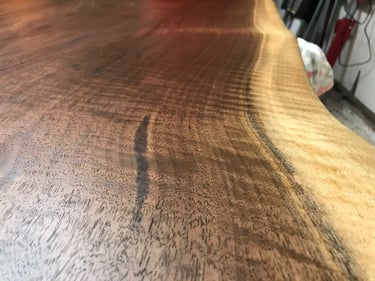
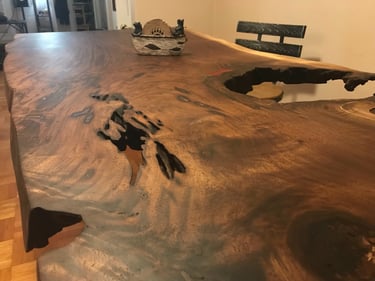
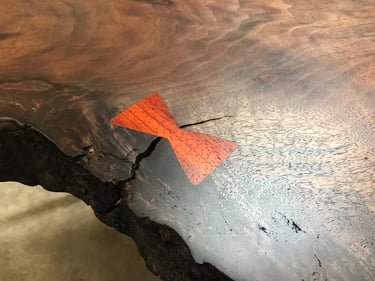
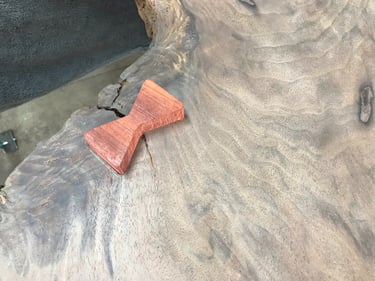
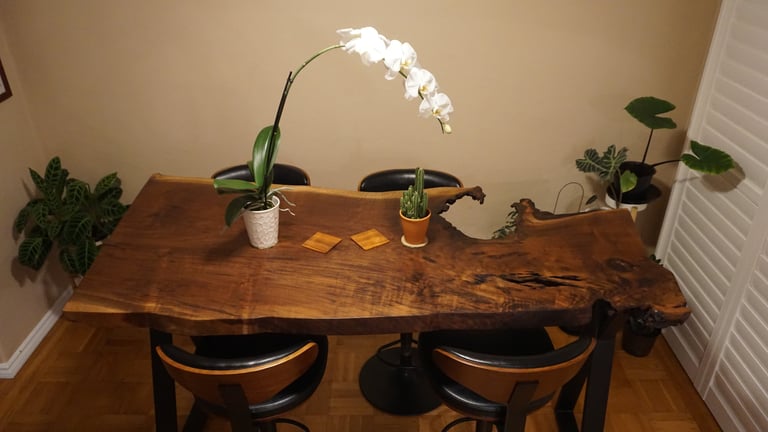
Tabletop Wood: Black Walnut (with bloodwood bowtie inlay)
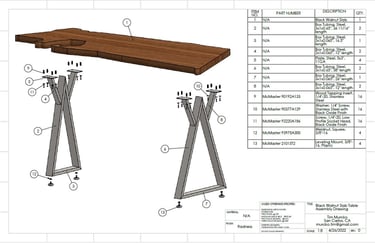
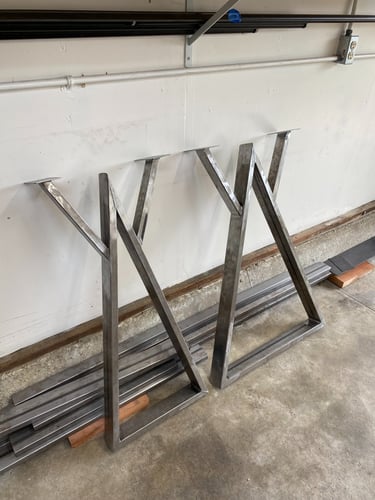
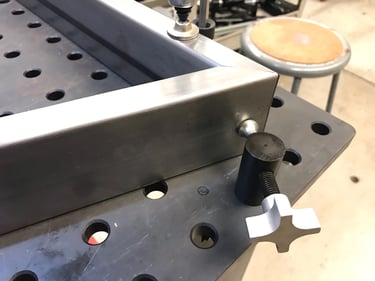
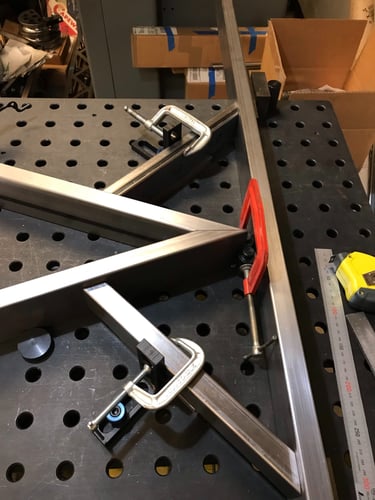
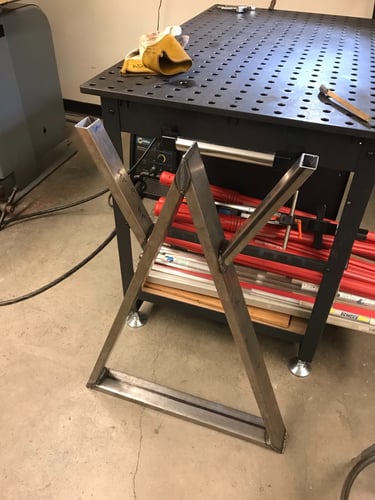
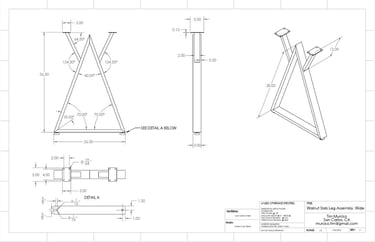
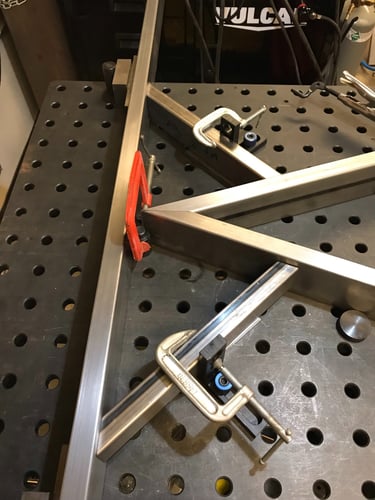
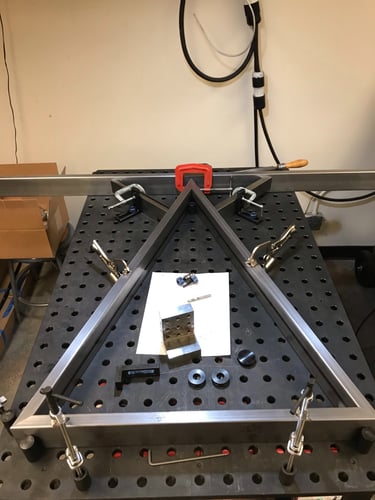
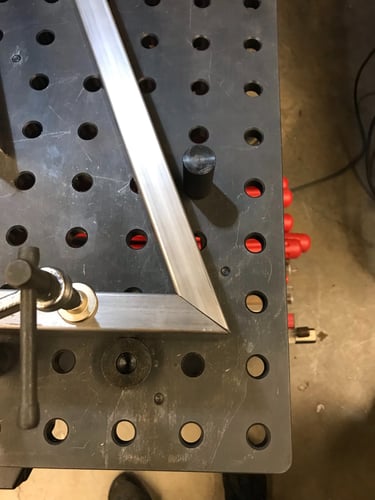
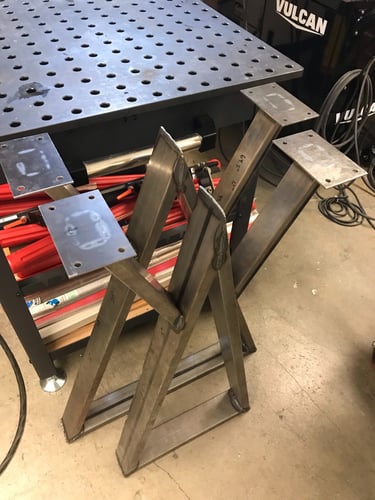
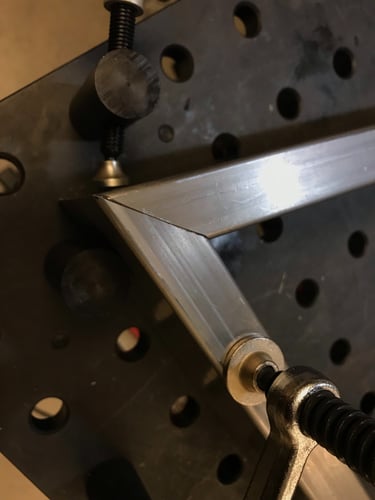
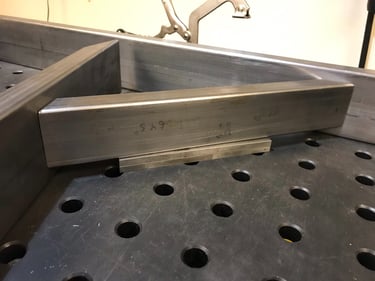
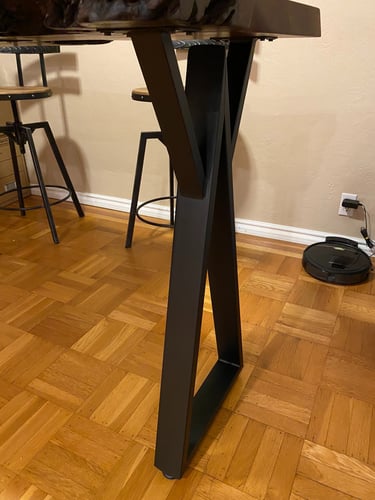
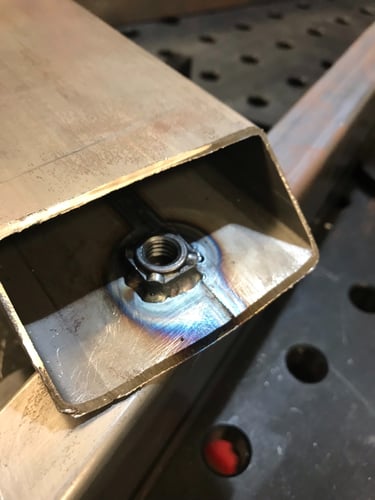
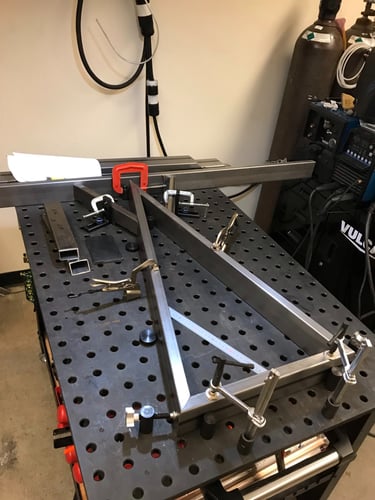
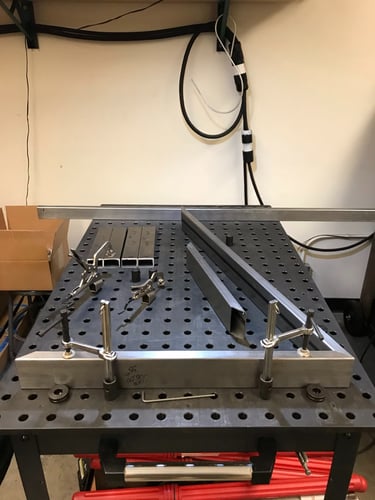
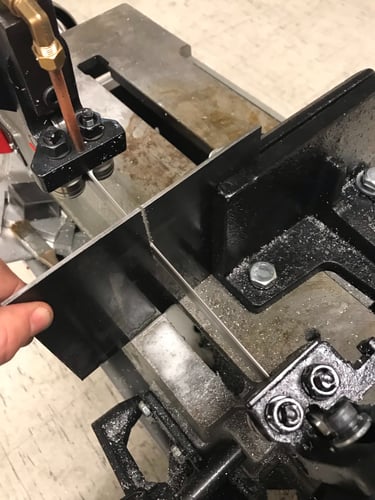
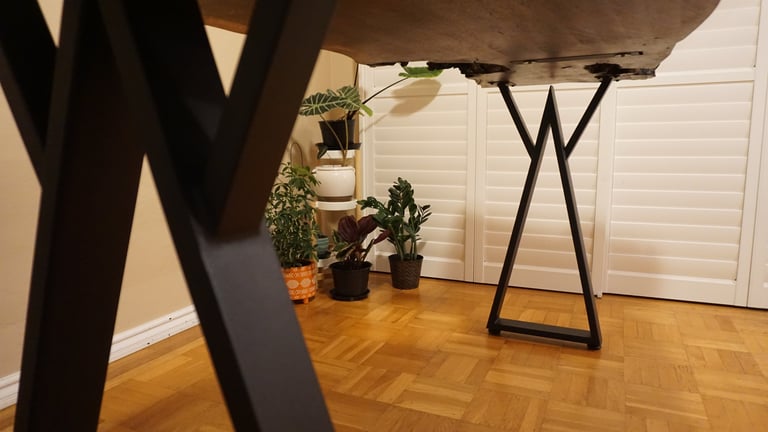
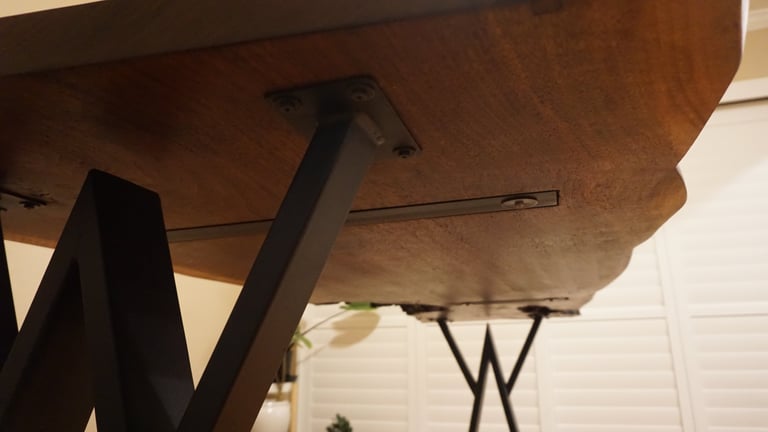
Leg Material: Steel, MIG welded, black powder coating, removable from top for transport, adjustable feet
Top Dimensions: Approximately 72x35in
Table Height: 40in
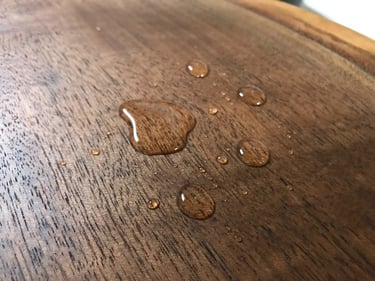
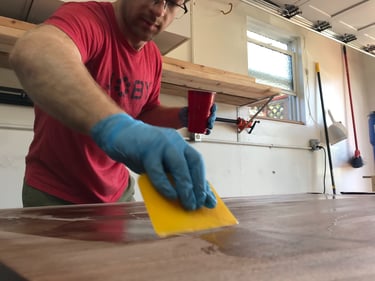
Finish: 220grit followed by hardwax oil (Rubio Monocoat) and ceramic top coat (Black Forrest)
Project Challenges and Lessons Learned:
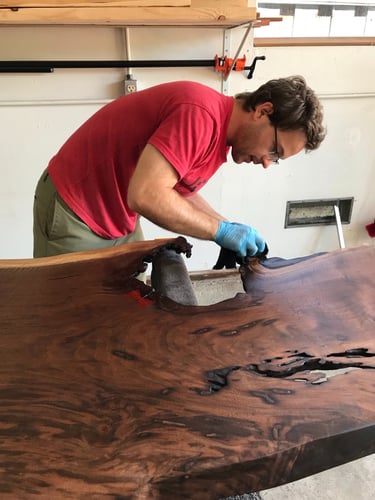
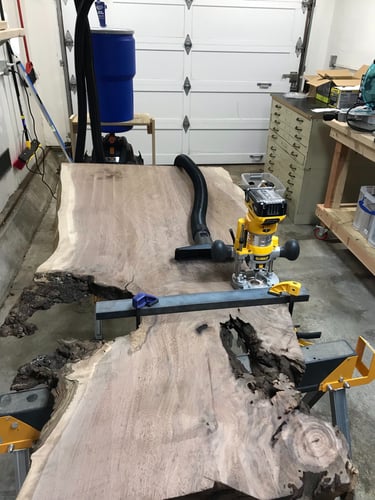
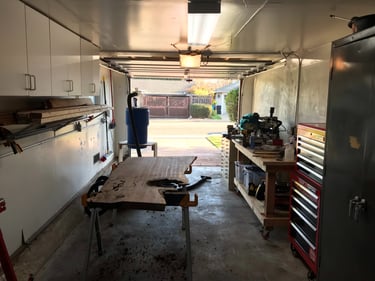
This was a big one (literally). Working with slabs is incredibly time consuming. There seems to be a never ending amount of cleanup, shaping, and sanding. Do not underestimate the amount of labor hours that can go into a project like this. And do not skip corners because your final finish can dramatically suffer.
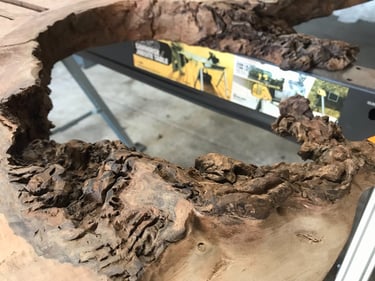
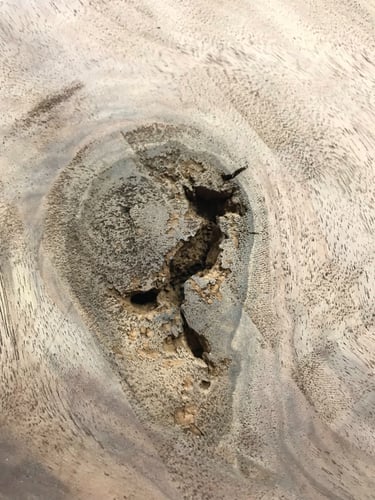
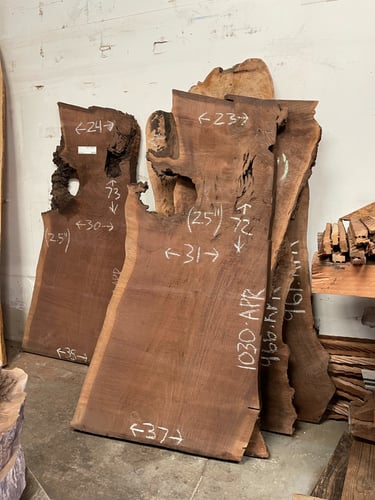
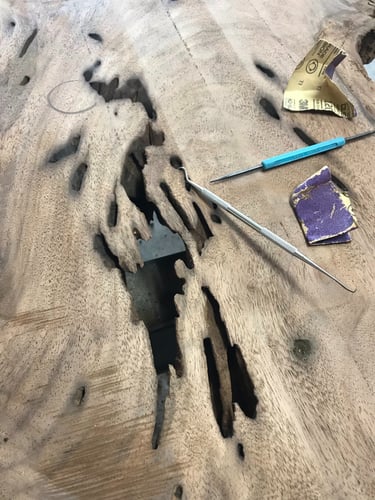
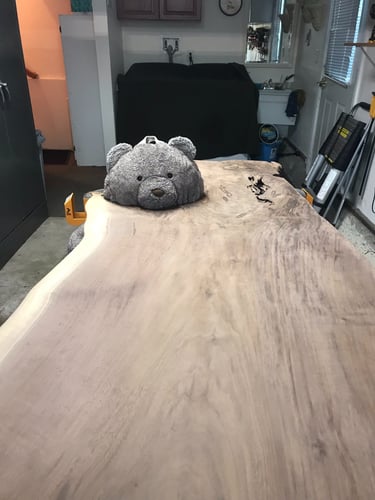
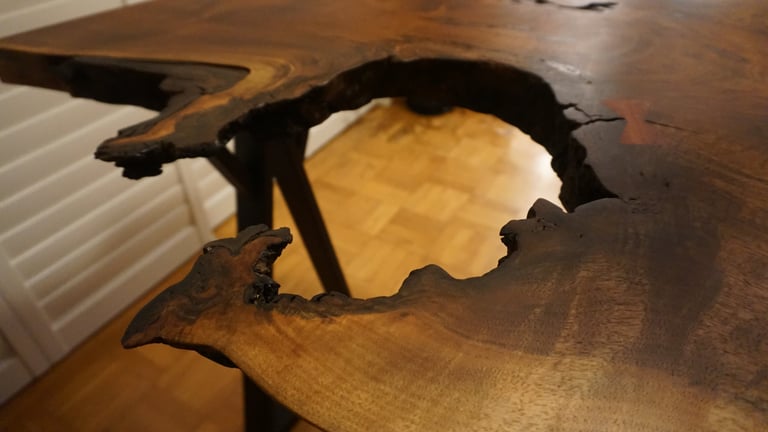
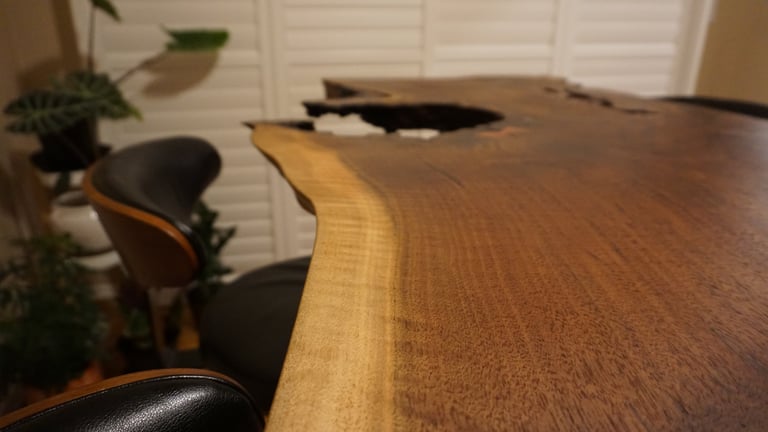
One of the most enjoyable parts of this project was visiting a local warehouse in Richmond and browsing through their collection. The variety of options was overwhelming, and my mind raced with possibilities. I chose this particular slab because it had the right size and thickness, beautiful grain and color, and most importantly, some very unique cutout features.
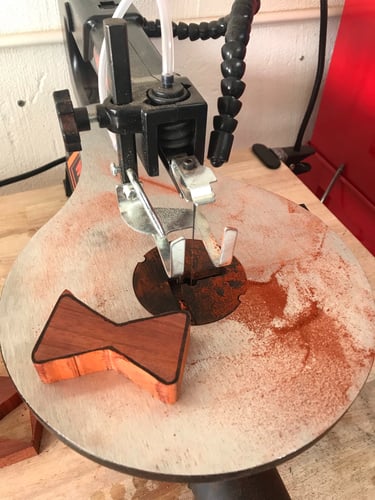
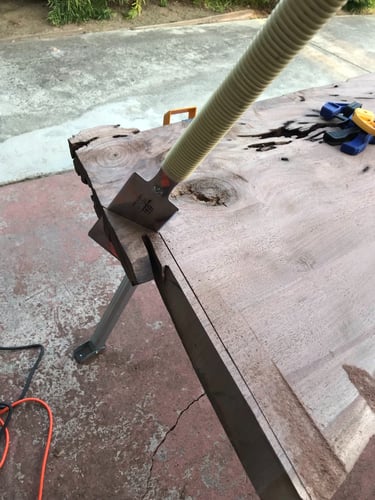
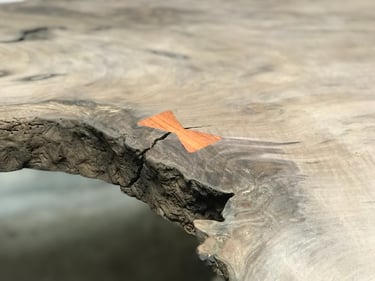
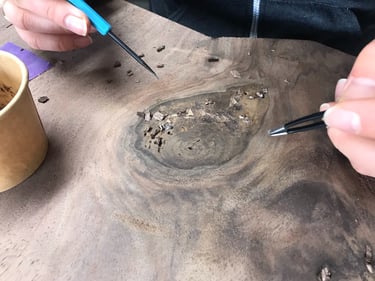
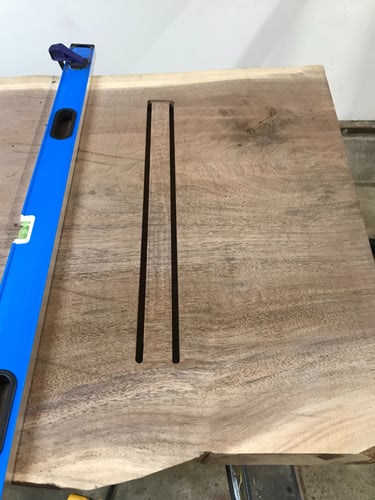
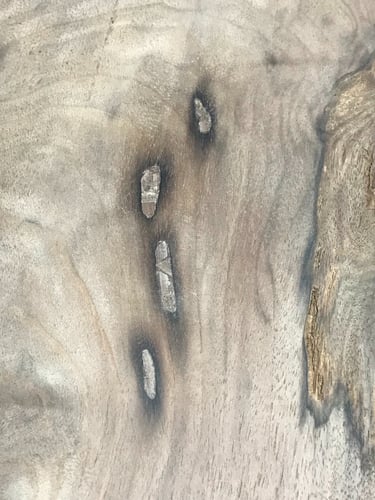
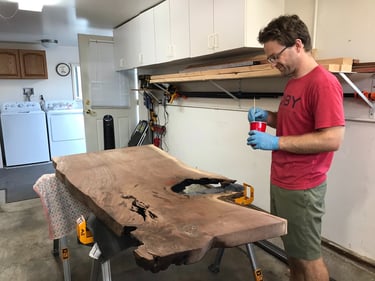
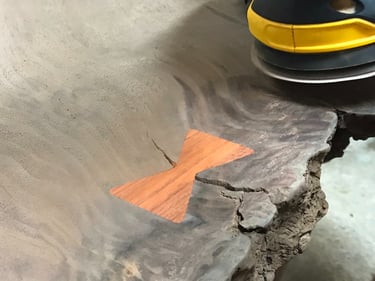
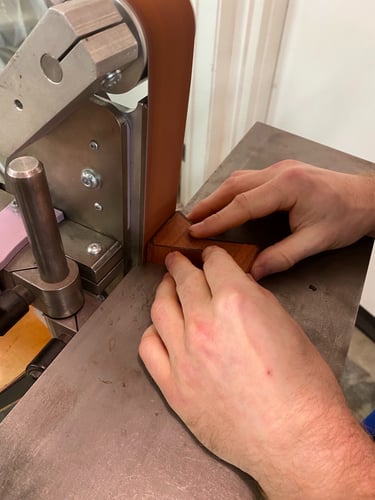
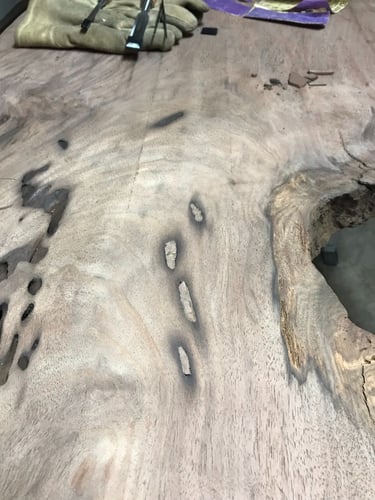
Now, about the controversy...I chose not to fill this table with epoxy. I would estimate that something like 80% of the slab tables I found online for inspiration and learning were filled with epoxy. It seems to be the cookie cutter approach on YouTube. For me personally, I just did not like the idea. I felt that it detracted from the natural character of the wood. Why fill a beautiful walnut slab with plastic? Meh, but to each their own. For the large cutouts and voids I removed the bark and cleaned up the sides. For the smaller holes I used little pieces of wood from other parts of the table. Taking the time to get the fits right was important as the sawdust and wood glue trick will only take you so far. This same approach was used for the bowtie inlay. Get your fit as snug as possible, especially when using drastically contrasted woods.
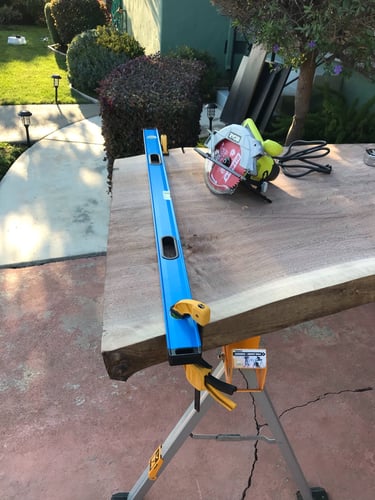
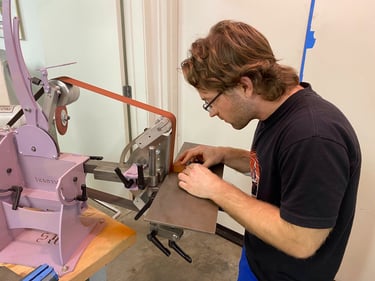
As for the legs, this was my introductory to MIG welding project. Yes yes, I know I should learn TIG. I will. Regardless, I would not have been able to do this without a welding table and help from an expert. I could have improved the manufacturability of the legs by thinking through the angles and table setups more. You can read a detailed blog on this here: Angles for Welding Tables.
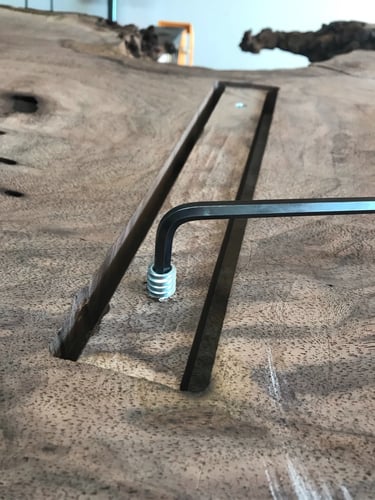
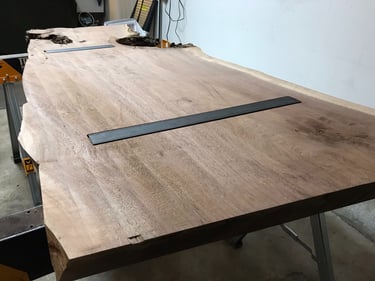
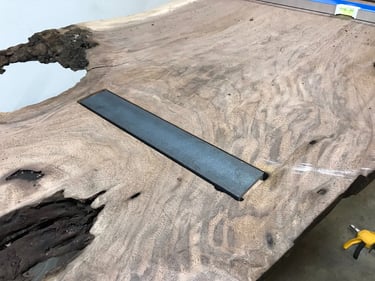
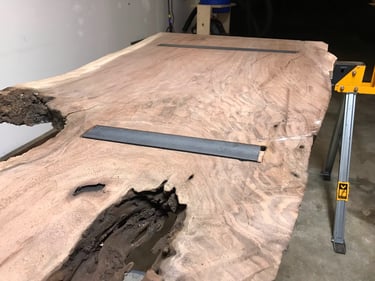
One last note: wood, even of this thickness and rigidness, will move. Really take this into consideration before starting your project. Set your self up for success by getting wood from a reputable source. This slab came from Peroba in Richmond, CA. It had already been both air and kiln dried, free from bugs. With that said, I still invested in a high quality moisture meter and double checked the entire slab. Once confirmed I had them flatten it. Do not even begin work until the piece is acclimated to your environment - trust me, it is going to hurt otherwise. After flattening, the first thing I did was to install steel C channel (with a loose fit to allow for some movement) on the bottom side to prevent warping. I also installed a bowtie on the main crack to prevent further propagation. Keep your environment dry and wrap the wood up in plastic wrap to slow down moisture ingress. This is all important until you are done finishing the wood. It is better to be a little paranoid then ruin a piece late into the project.