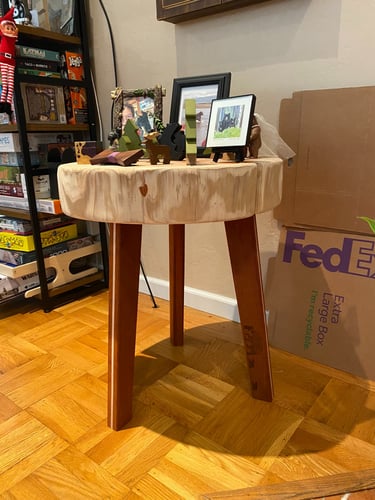
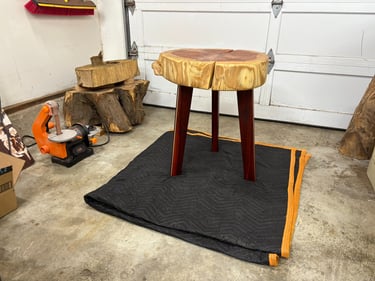
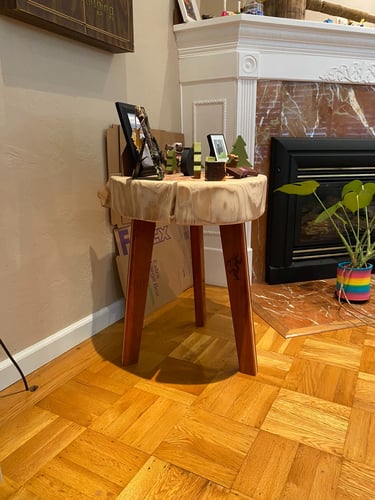
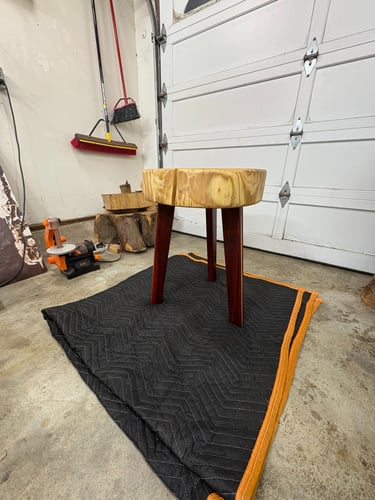
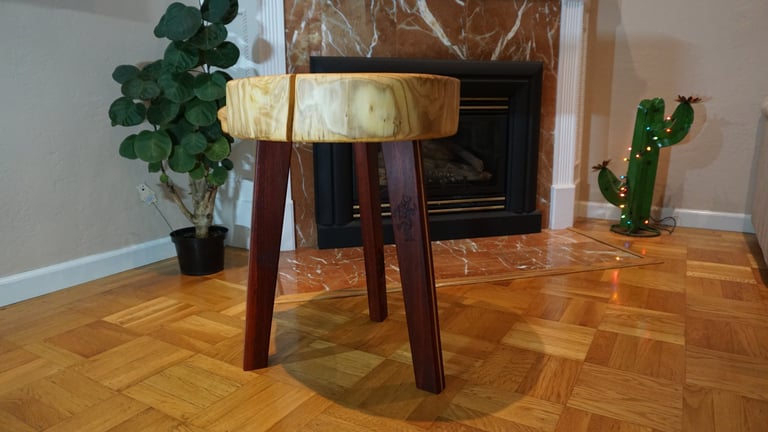
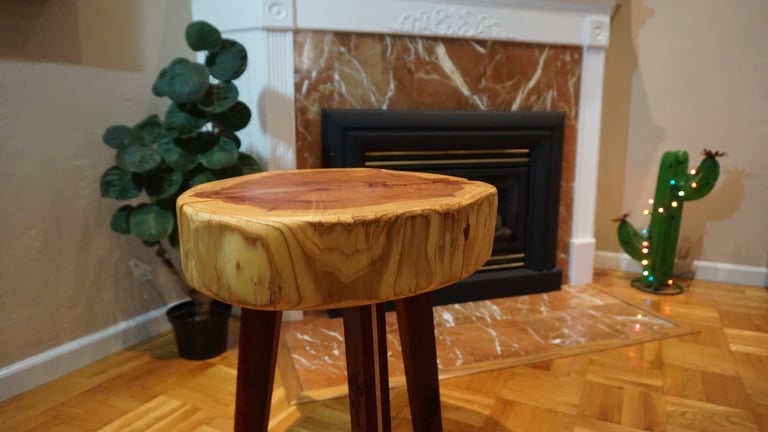
Redwood End Table II
January - June, 2025
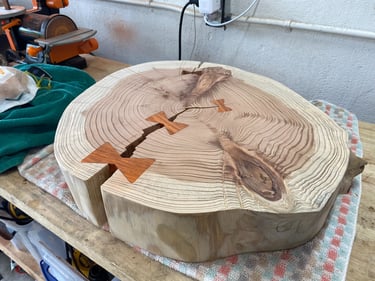
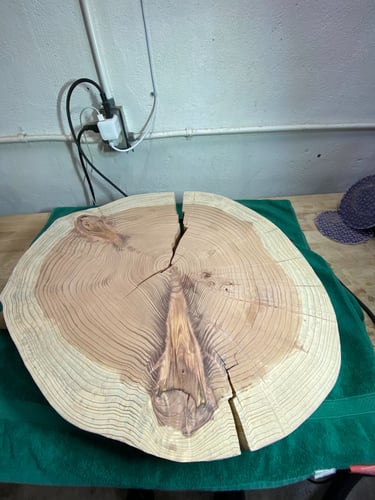
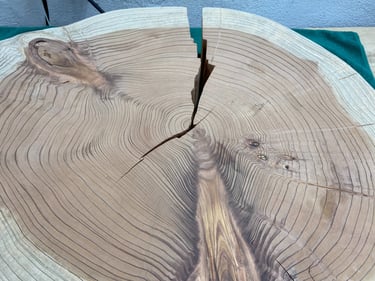
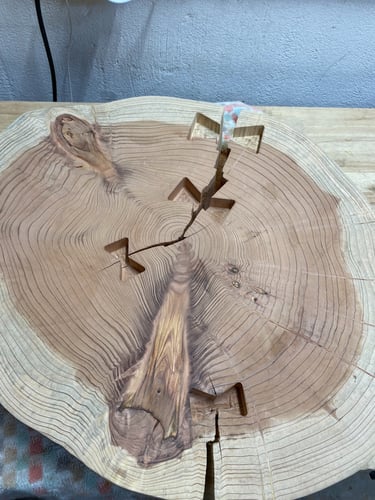
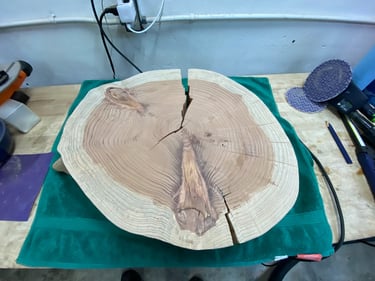
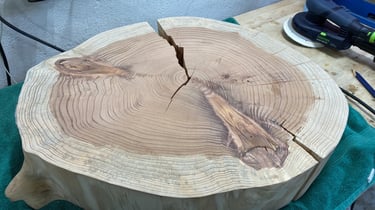
My second attempt working with redwood and taking what I learned the first time to the next level. This piece is packed with inlays, engravings, and little Easter eggs, setting it aside as my most feature packed slab project so far.

Technical Details
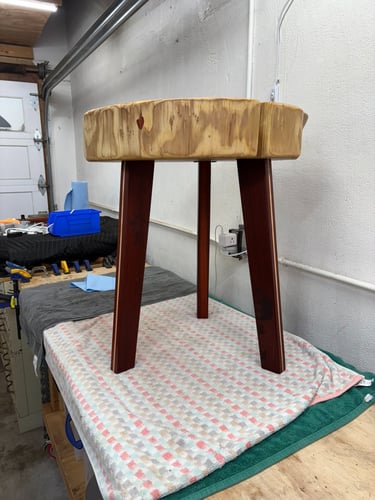
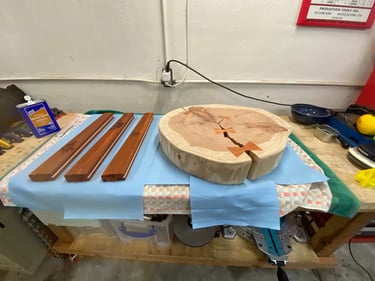
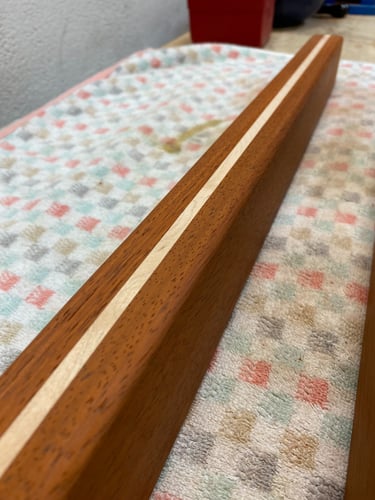
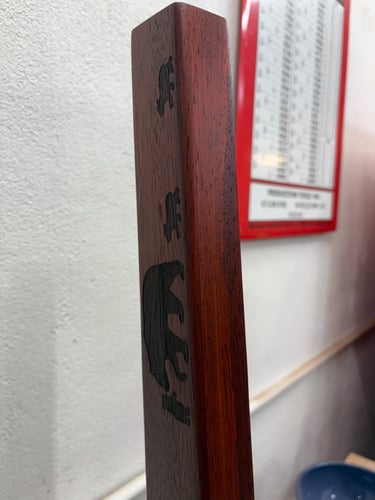
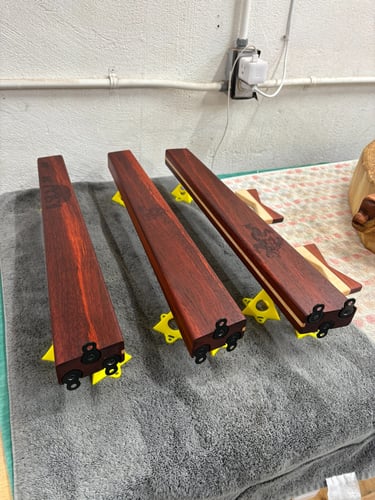
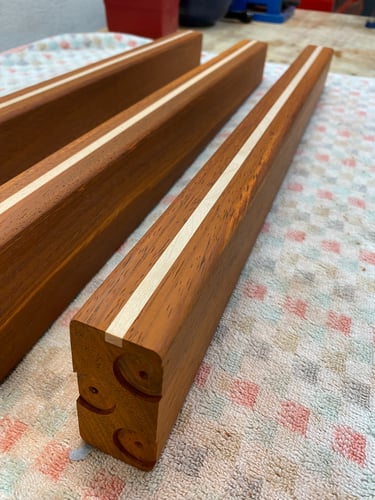
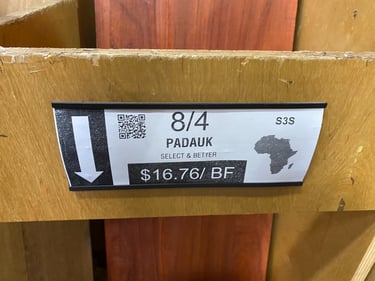
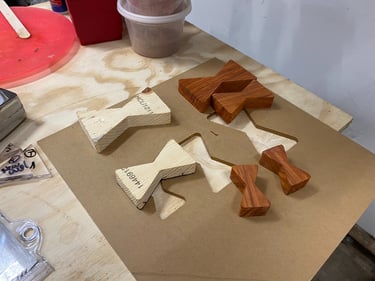
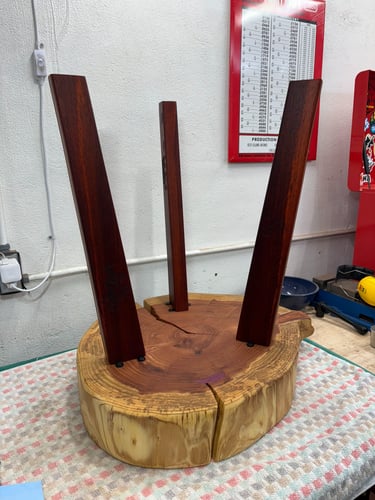
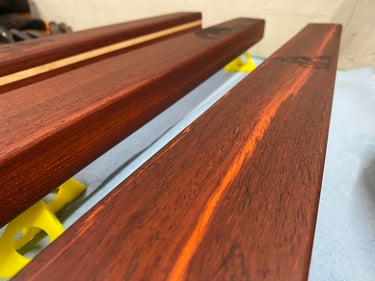
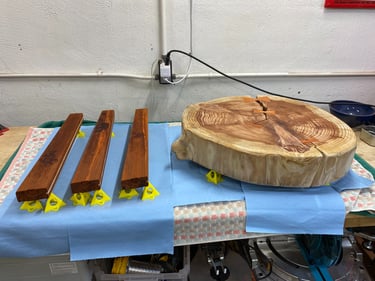
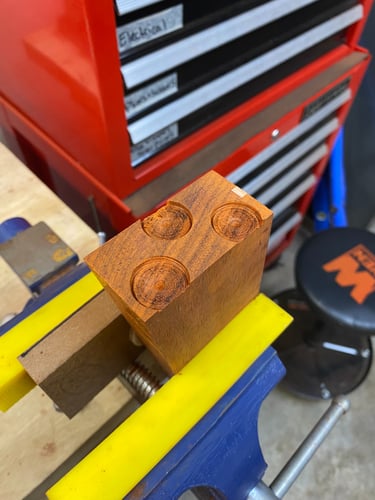
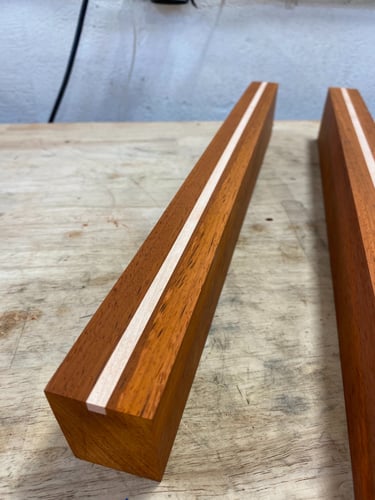
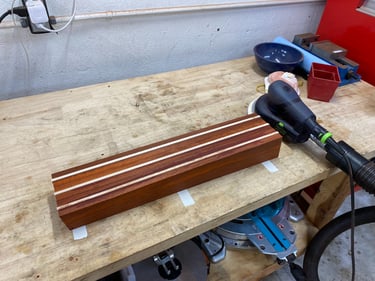
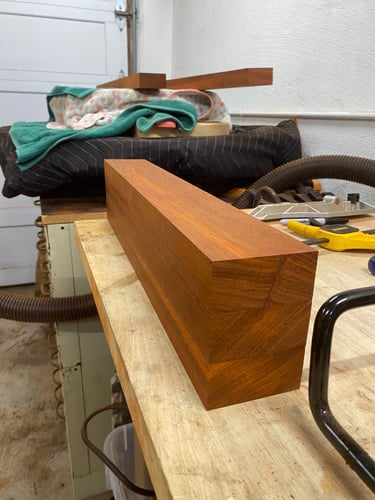
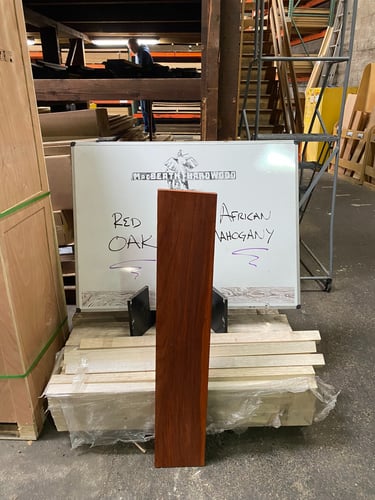
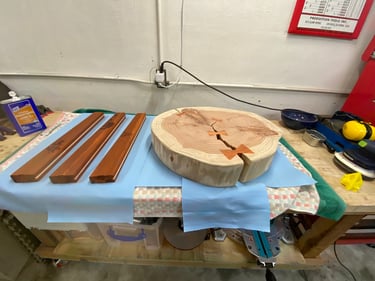
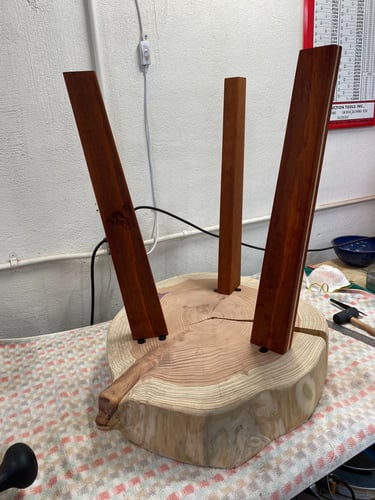
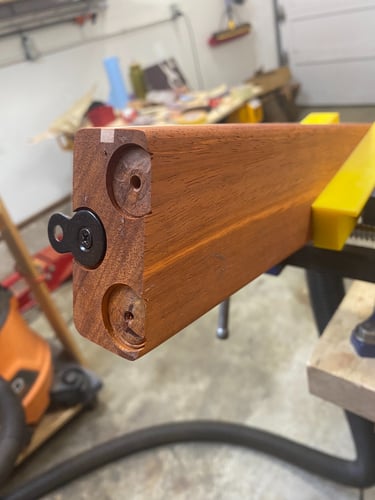
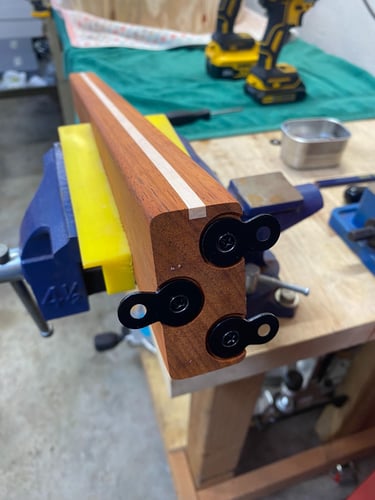
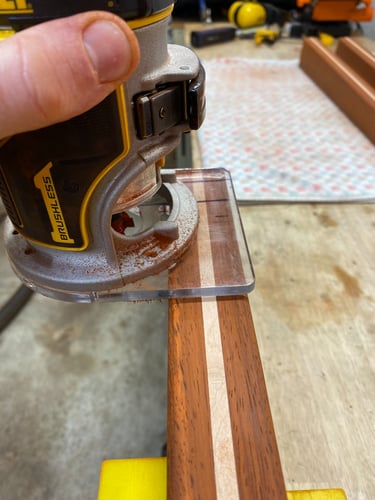
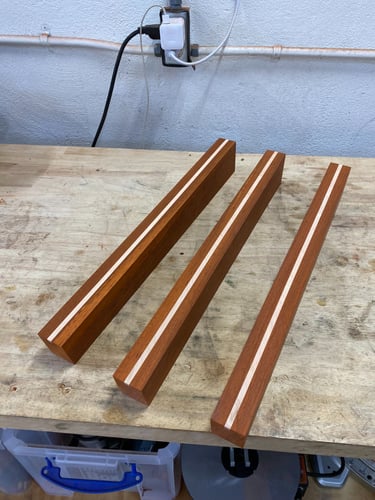
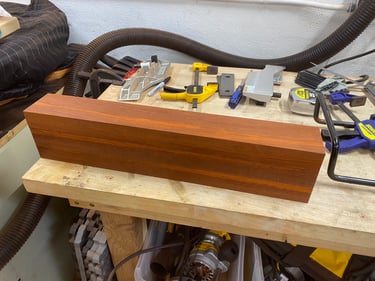
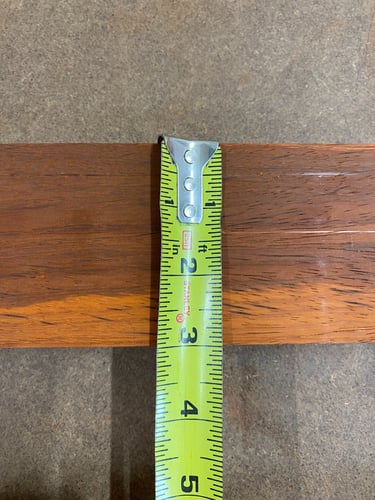
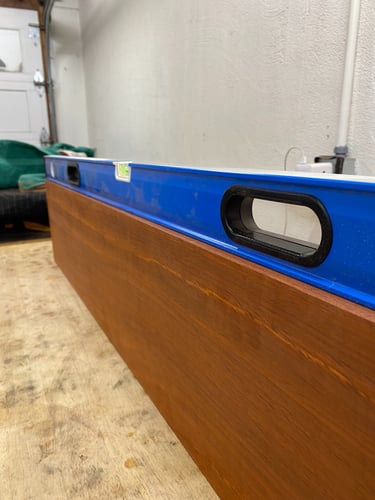
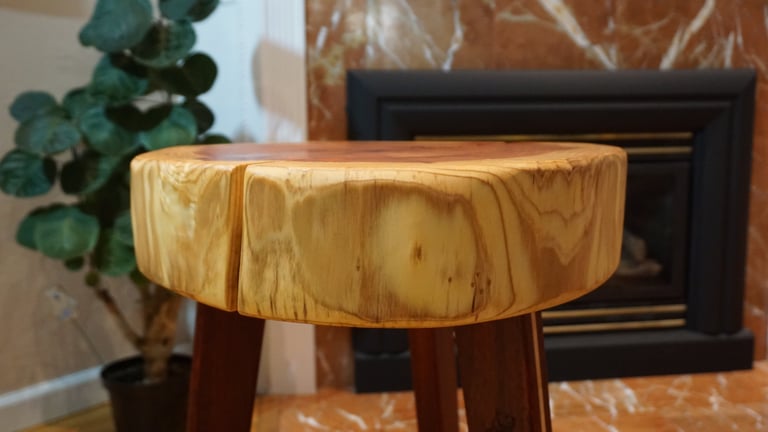
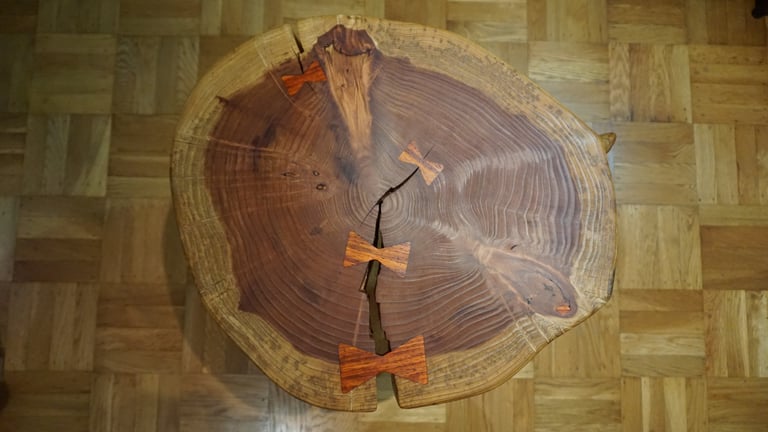
Woods Used: Redwood slab with Padauk bowtie inlays and Padauk legs with curly maple inlays (can be removed for transport)
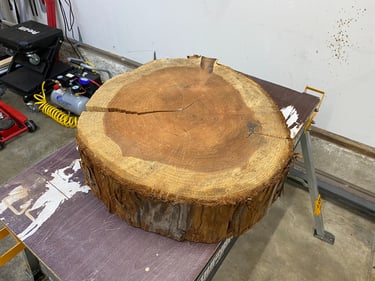
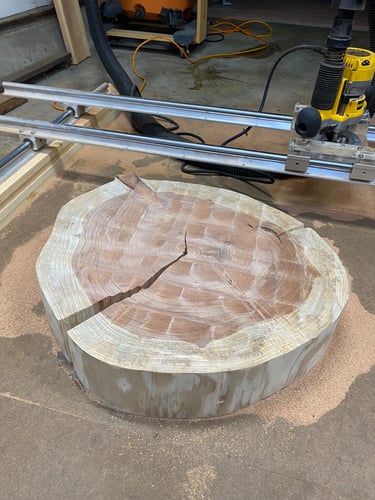
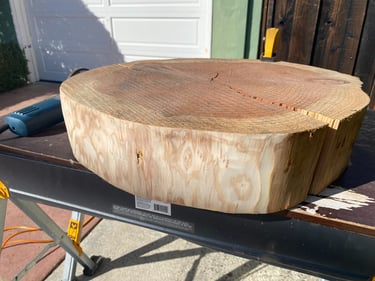
Slab Size: Approx. 21in diameter
Table Height: 25in
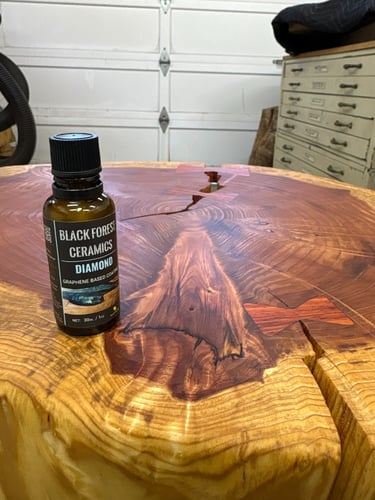
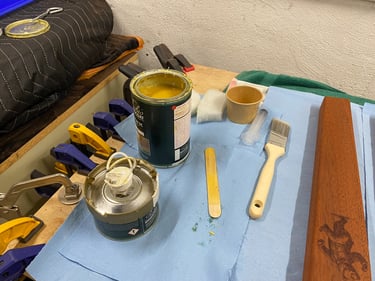
Finish: 220grit followed by hardwax oil (Rubio Monocoat) and ceramic top coat (Black Forrest)
Project Challenges and Lessons Learned:
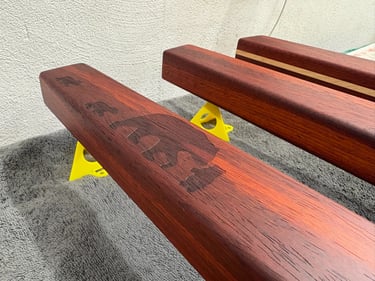
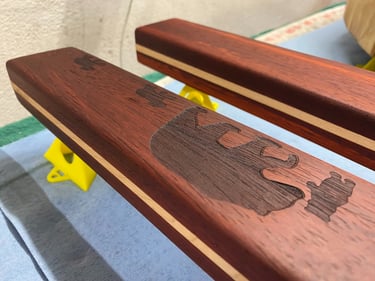
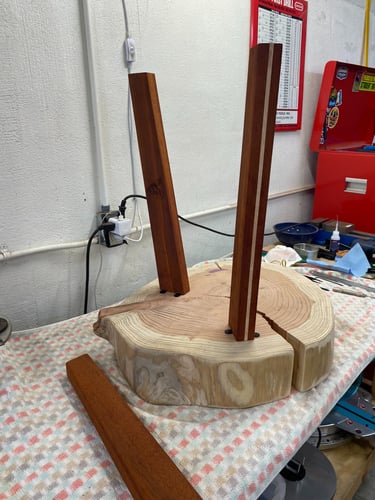
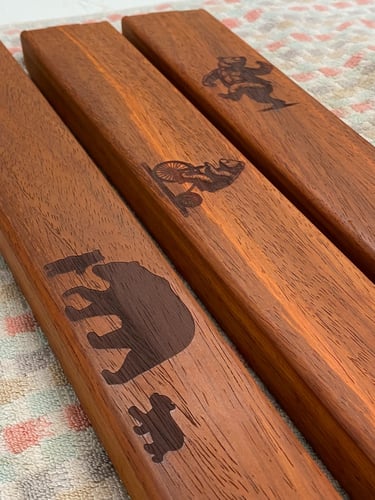
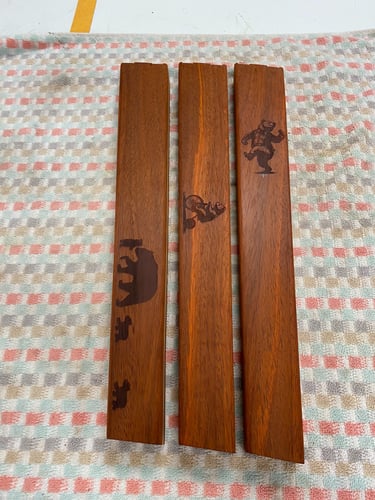
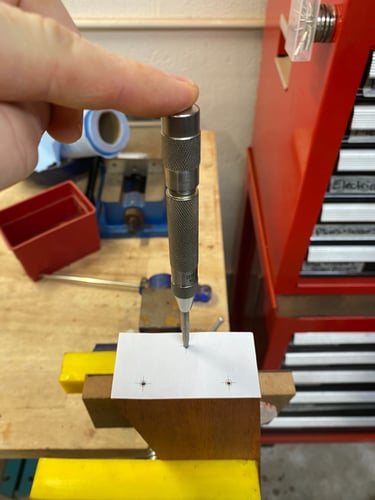
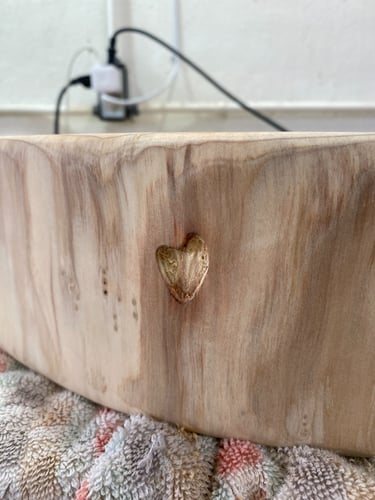
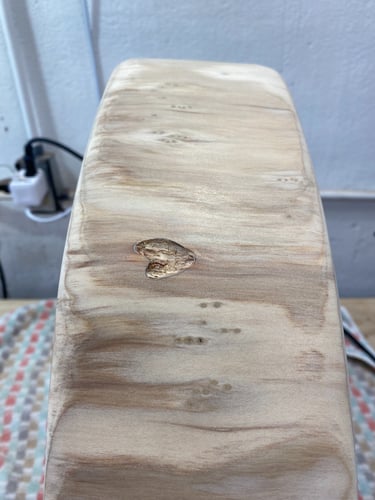
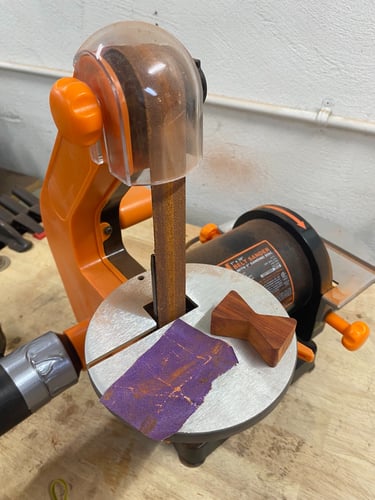
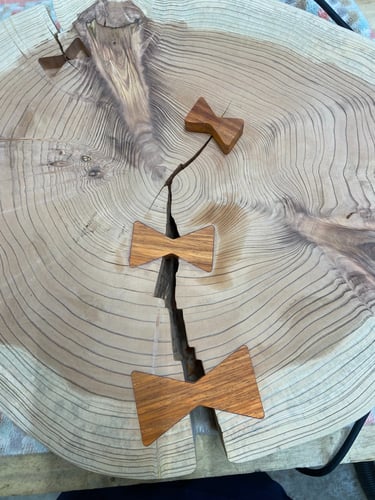
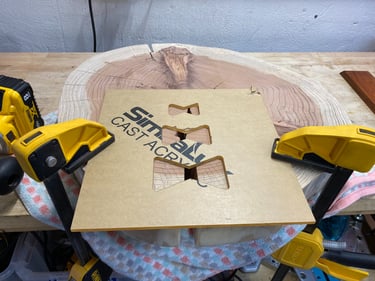
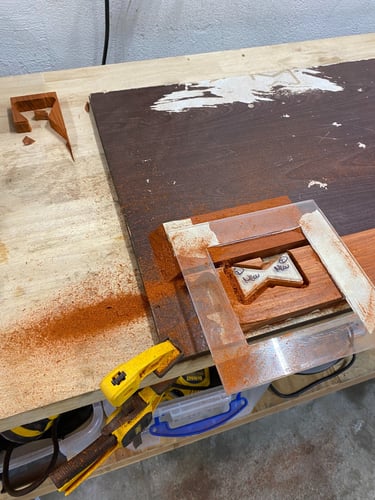
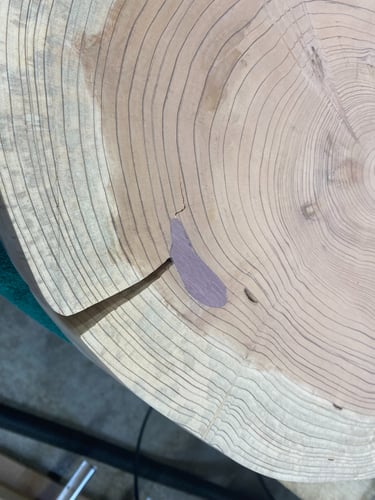
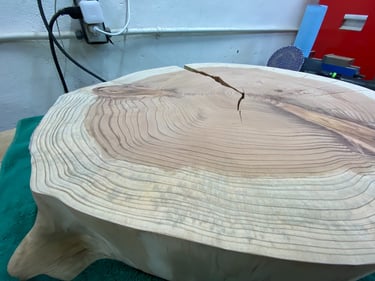
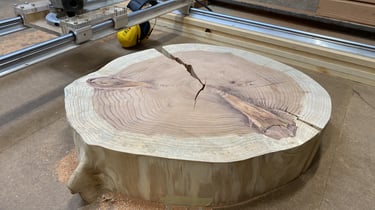
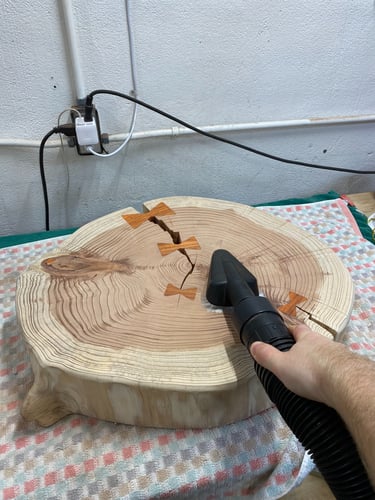
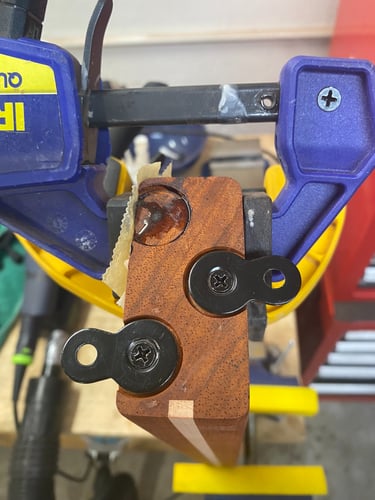
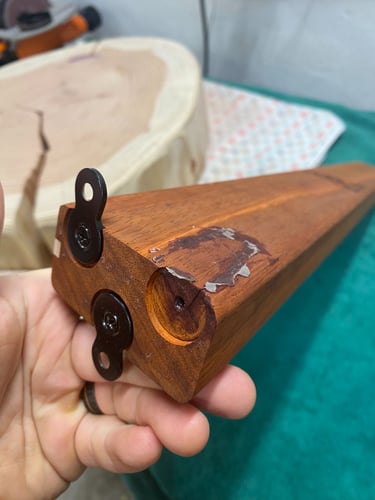
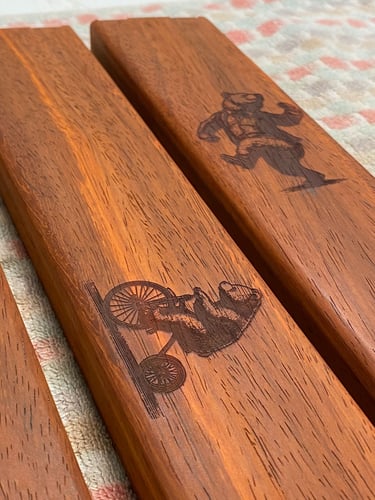
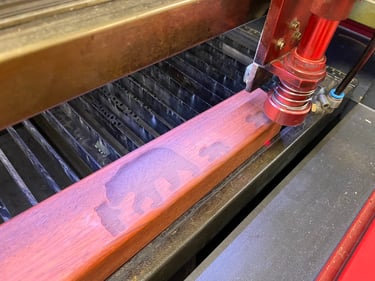
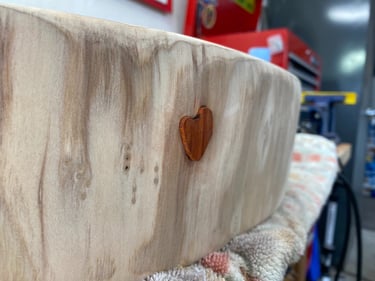
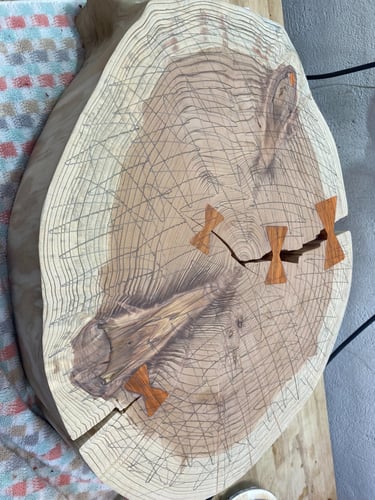
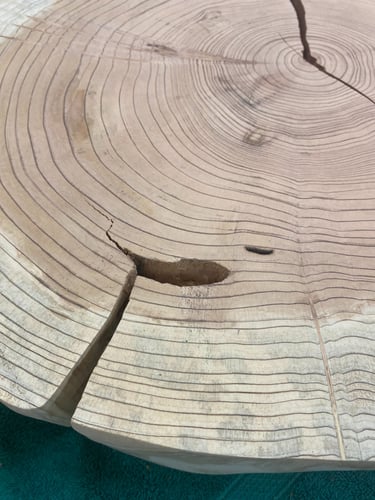
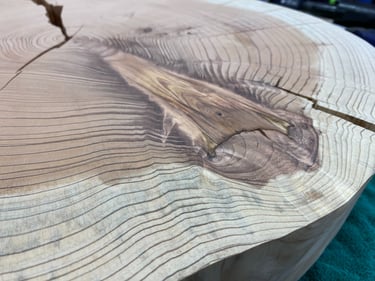
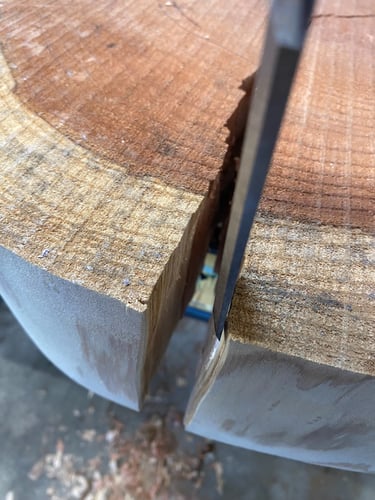
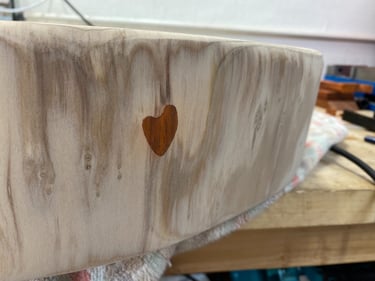
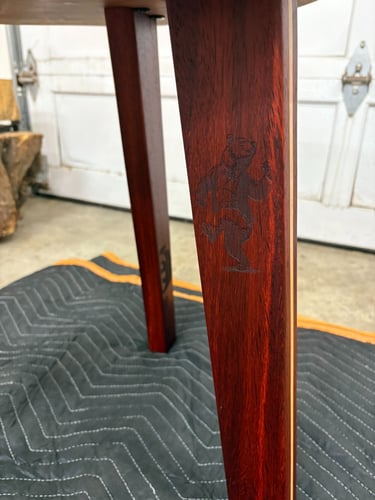
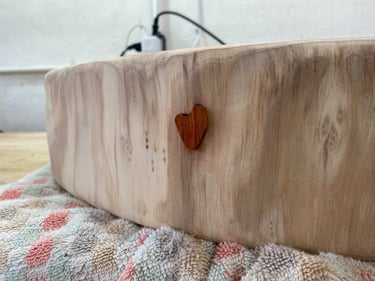
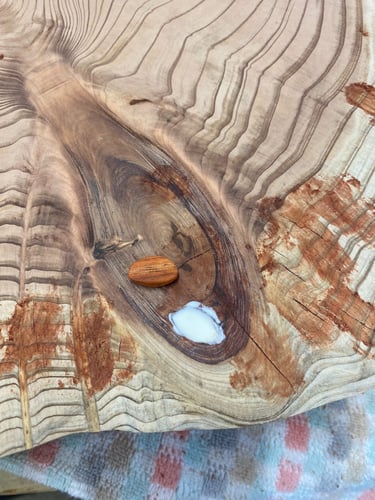
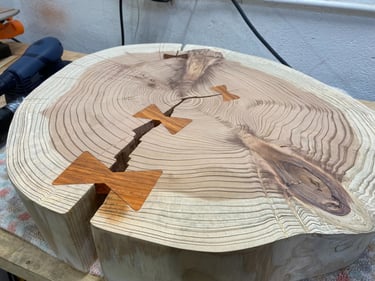
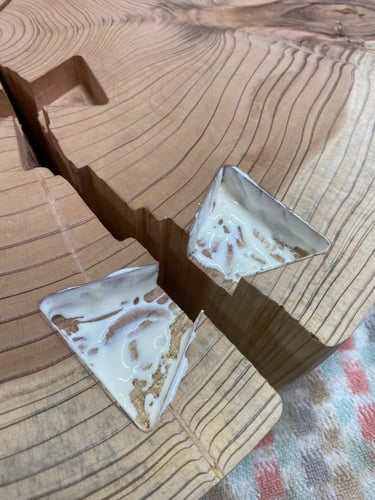
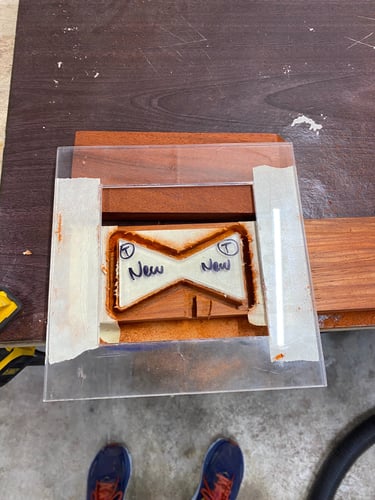
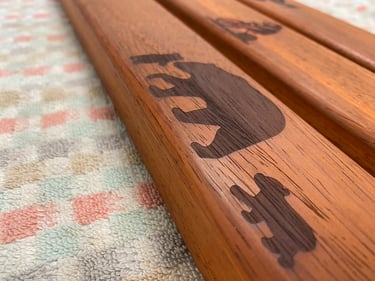
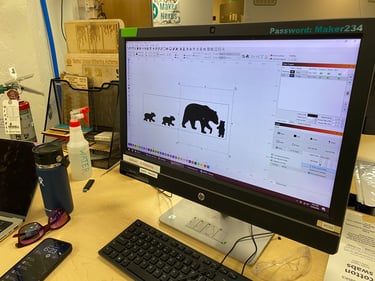
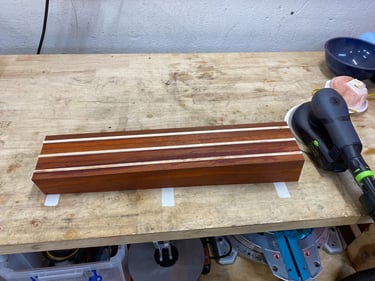
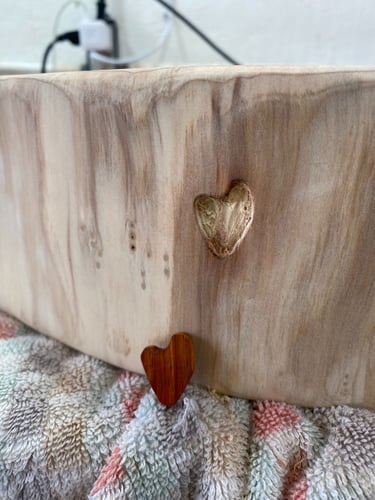
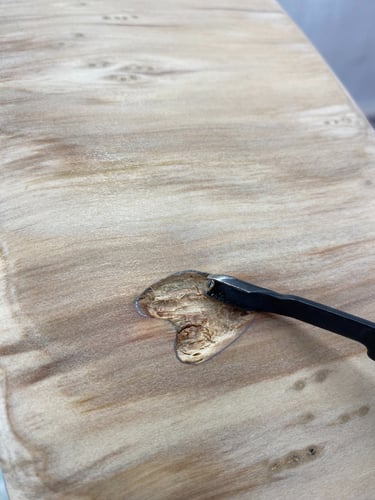
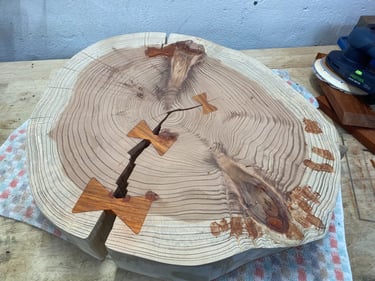
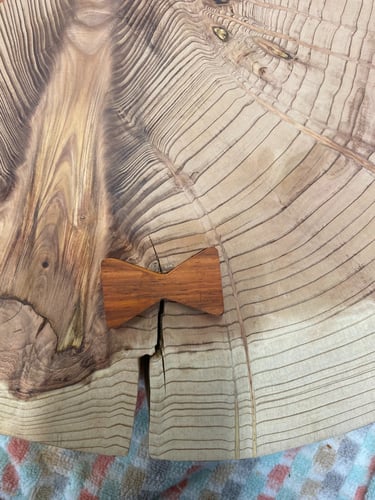
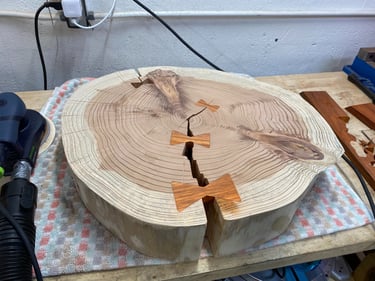
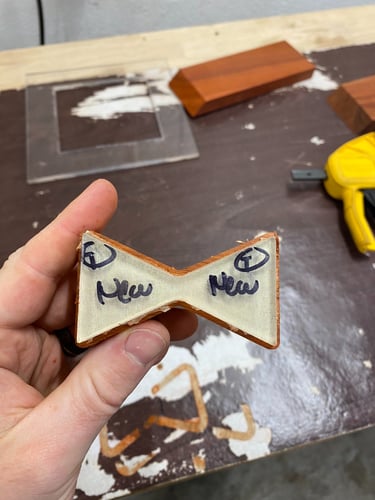
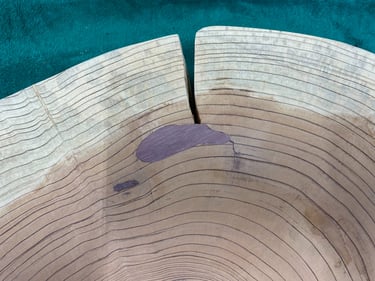
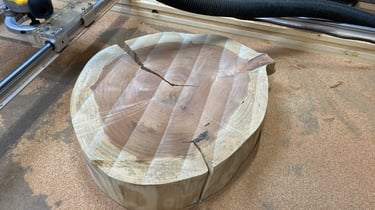
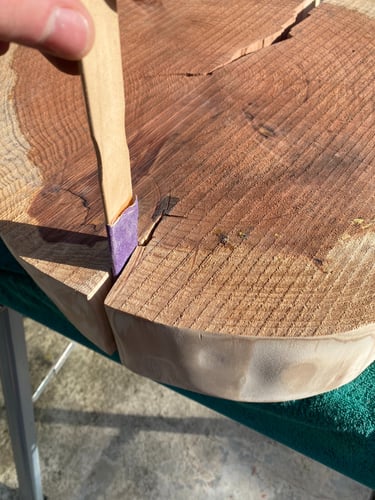
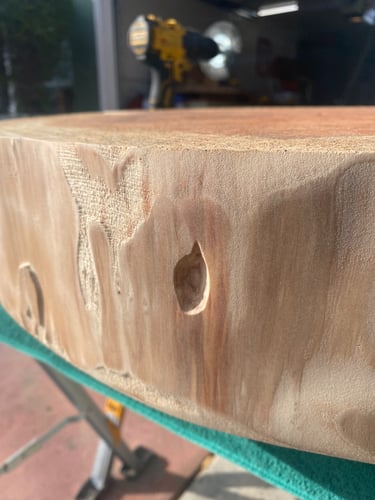
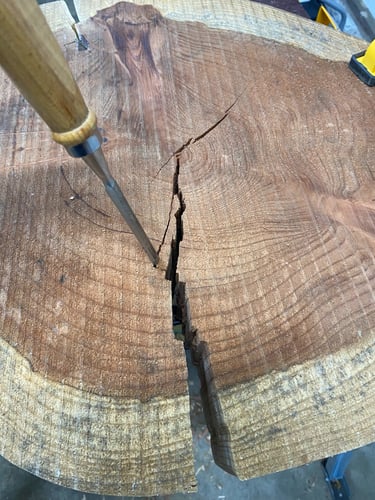
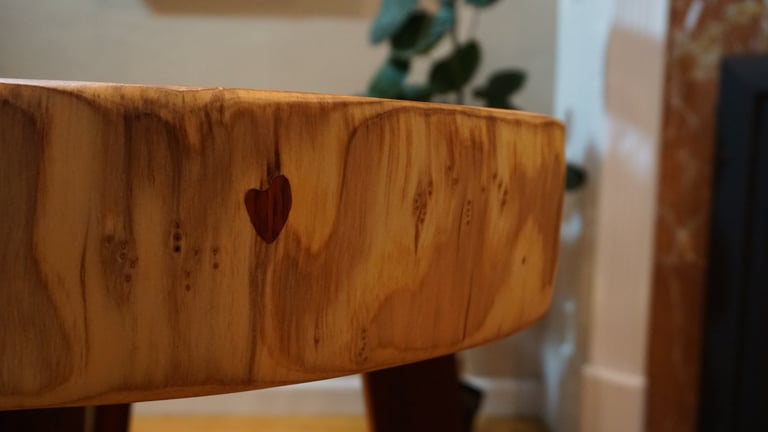
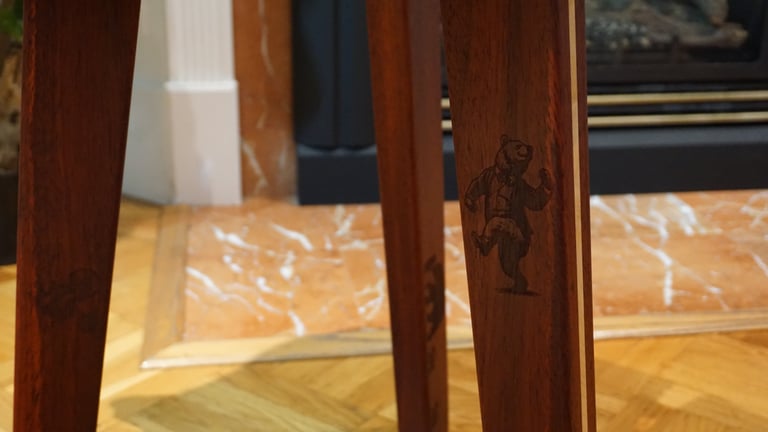
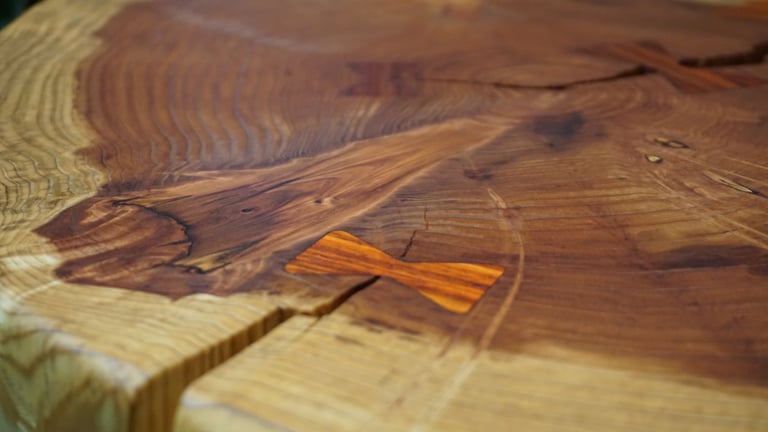
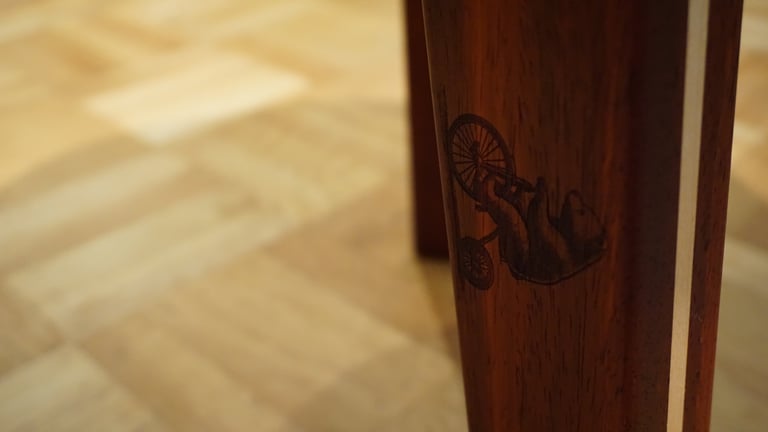
This project took way too long, but I do think it genuinely came out really nice and was a huge step up from the first redwood slab. It has Padauk bowtie inlays to stich the top together, an Easter egg heart inlay on the side, and legs made of Padauk to pop the top inlays which have their own curly maple racing stripe inlays to give them a sleek modern look. To top it off, all three legs have laser engraved bears (all unique images of course) because we love bears! I am pretty proud, I do not think you will find something quite like this.
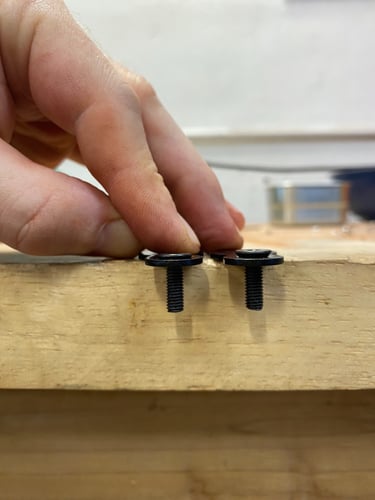
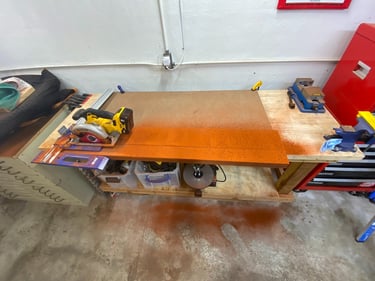
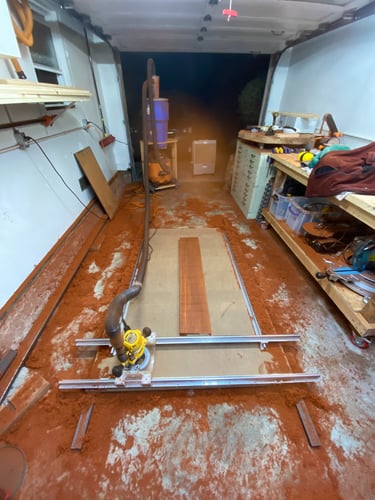
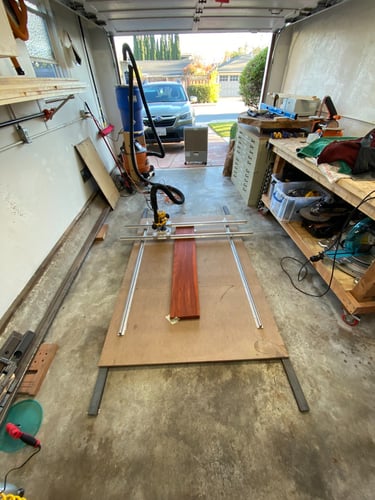
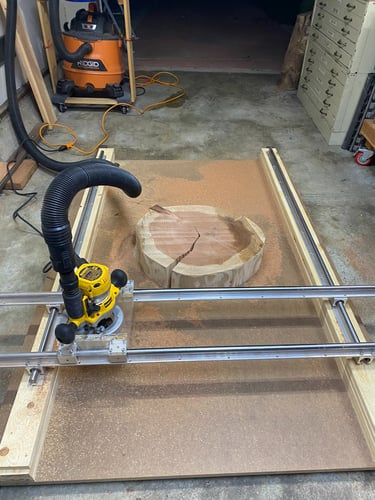
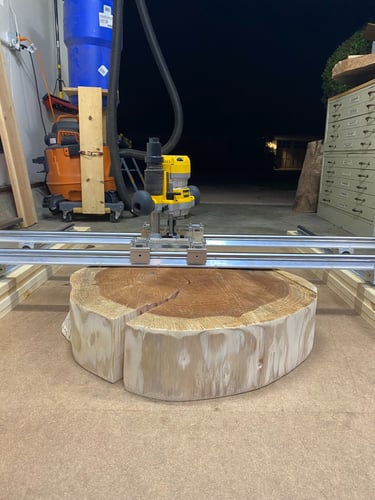
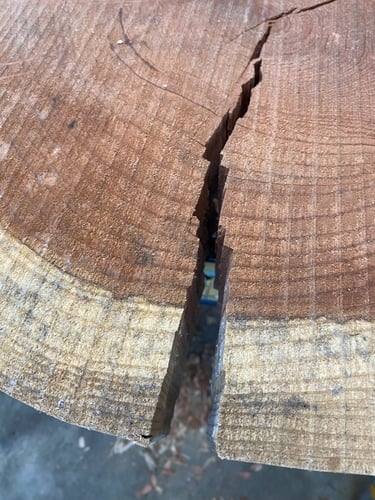
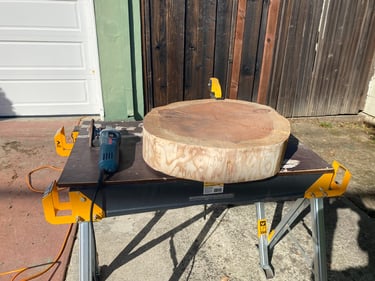
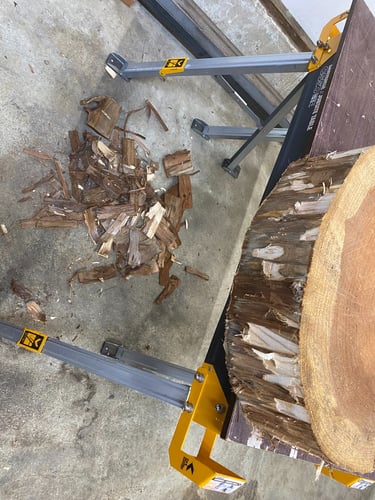
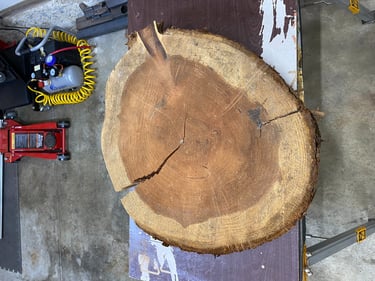
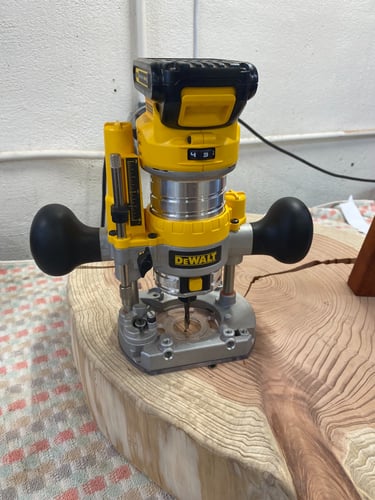
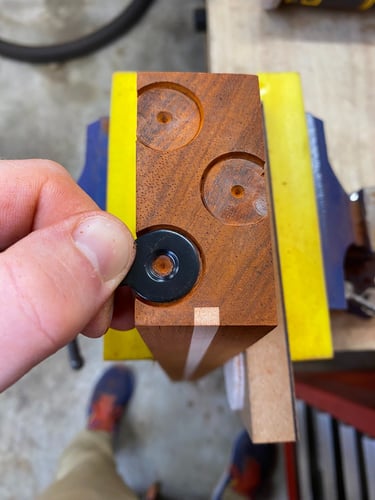
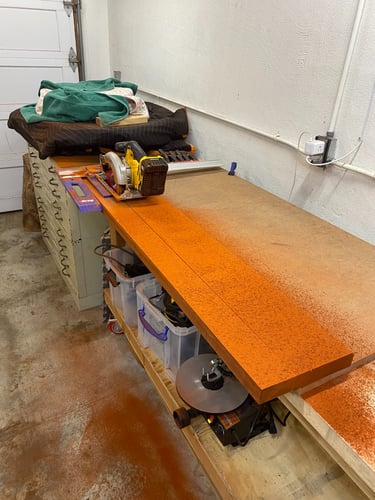
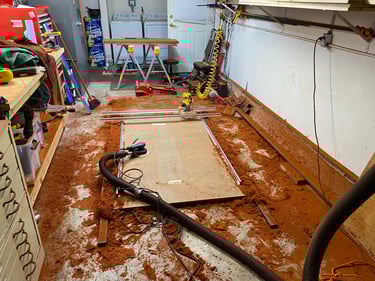
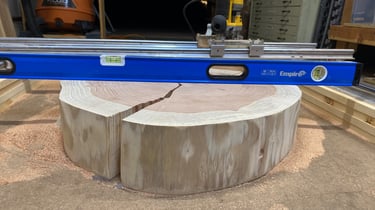
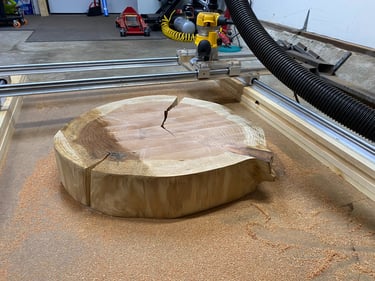
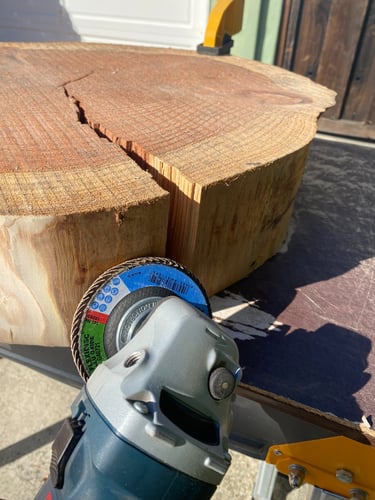
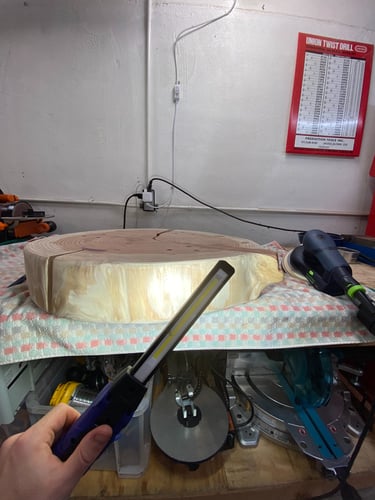
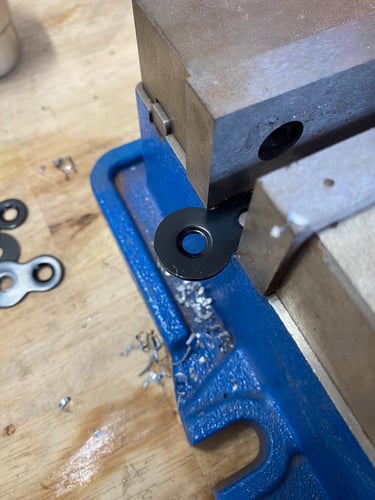
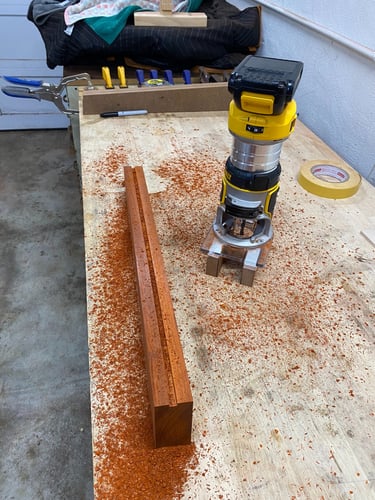
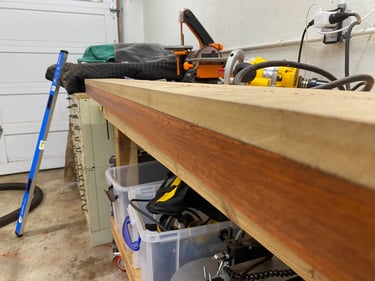
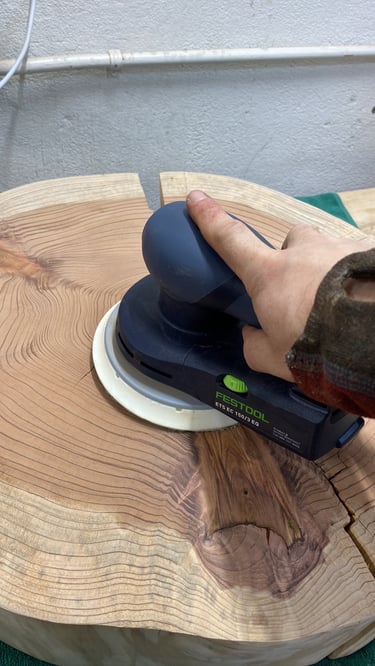
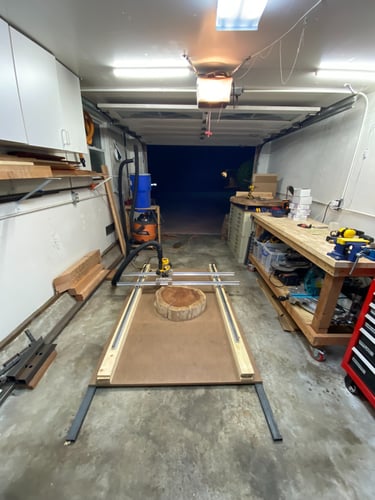
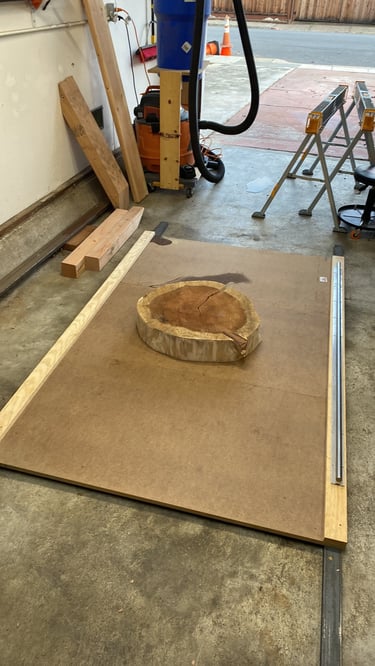
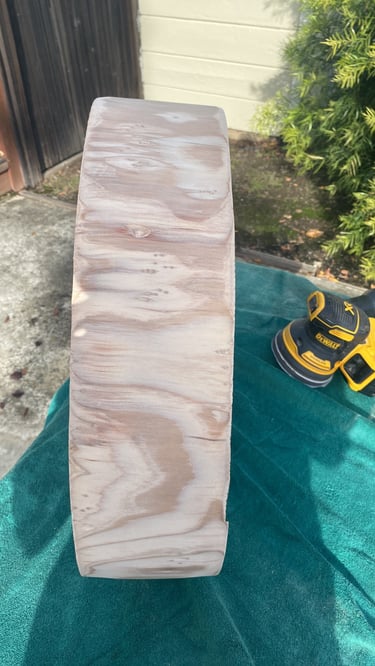
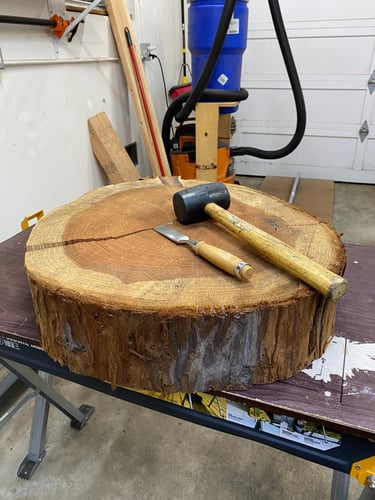
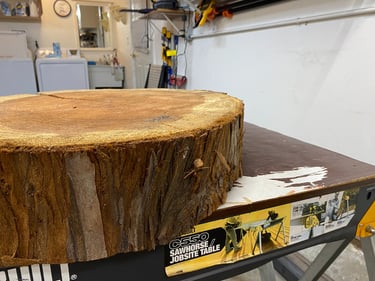
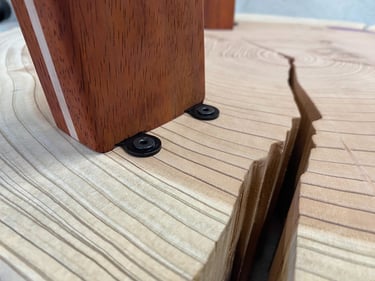
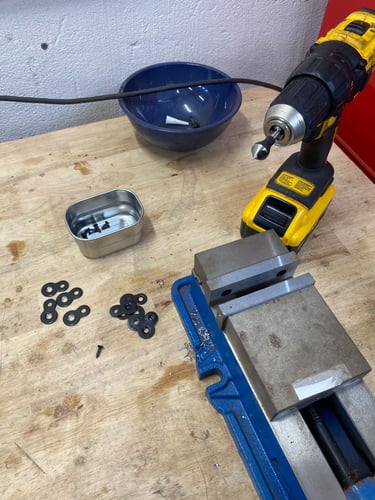
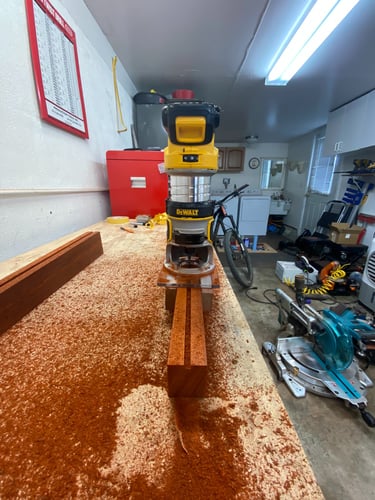
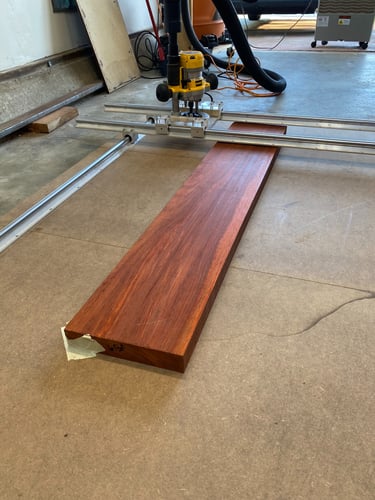
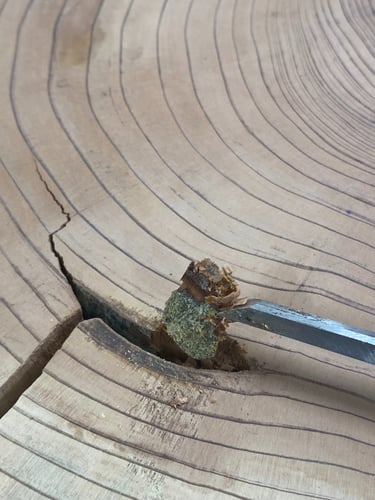
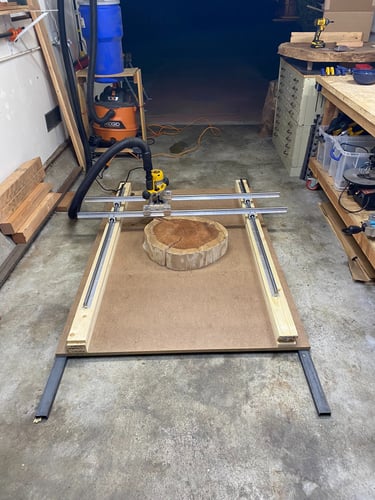
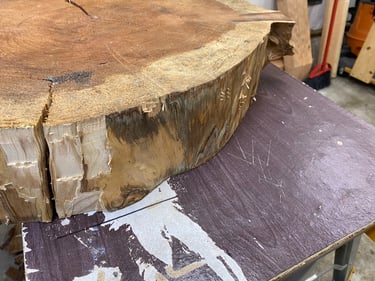
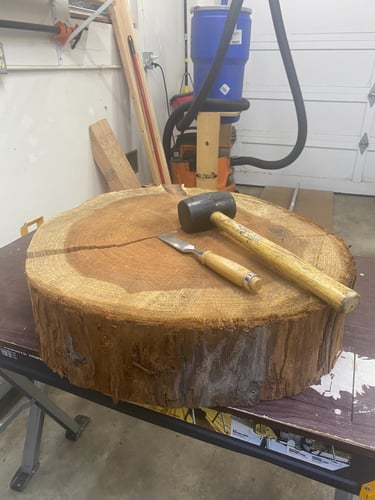
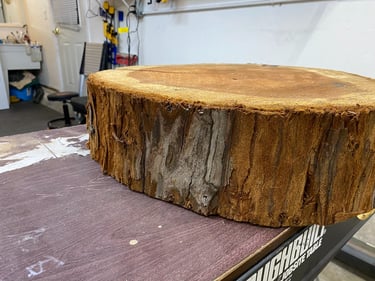
I used my previous mistakes to my advantage in a few key areas: First, I flattened the slab in house on my router sled. This allowed me to start with a very consistent base, made sanding faster, and allowed me to trim down the thickness to something a bit more appealing. I had to standoff the sled but it was nothing a little Home Depot wood could not solve. Secondly, I took sanding really seriously this time around. I finally bit the bullet and invested in a proper orbital sander: ETS EC150/3 EQ-Plus. I put this off for so long because I could not justify the price, but it truly is worth it when you do this kind of work all the time and are looking for perfection. It is faster, easier to get consistent sanding from a larger disc and lack of heavy vibrations, and does not tire you out as much which can lead to sloppy work. I went from grit to grit, sometimes multiple rounds on the same grit until I was satisfied. I used a light to highlight swirl marks and kept working it. Lastly, I learned my lesson the hard way about leg mounting hardware and preemptively epoxied the threaded inserts into the redwood, let them cure for two days, and then went back to work. Three months later and still no issues so far (last time the inserts chewed up the wood and they actually came loose).
I am using Black Forrest "Diamond" Ceramic top coat on this piece for the first time. I do not think it provides an improved look or sheen compared to other Black Forrest products I have used, but they claim it lasts longer (5 years) so hopefully less maintenance in the long run.
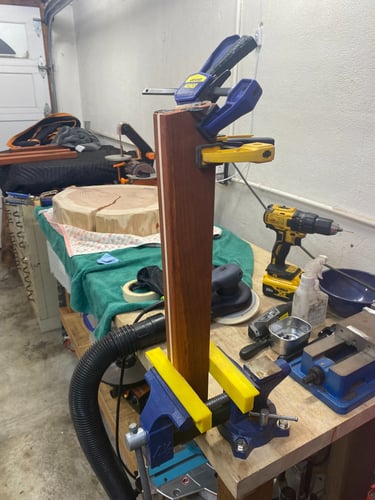
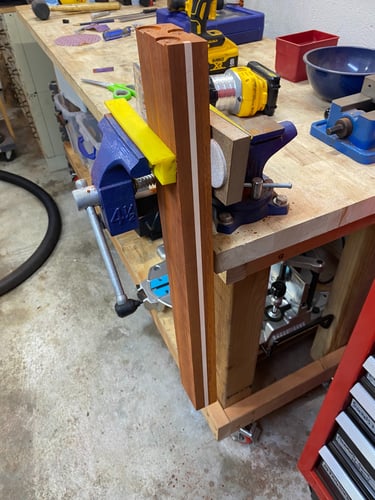
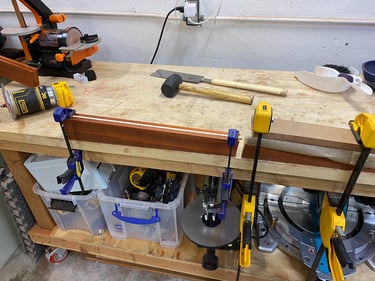
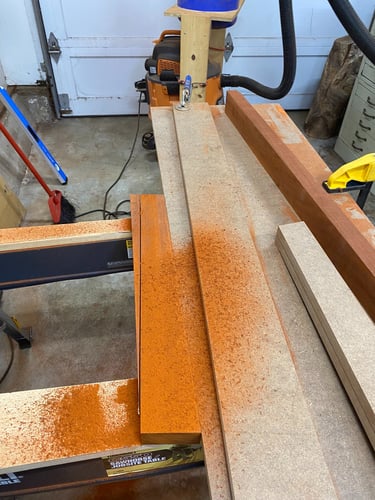
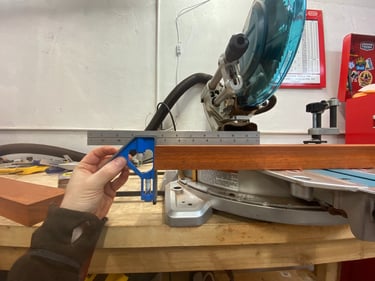
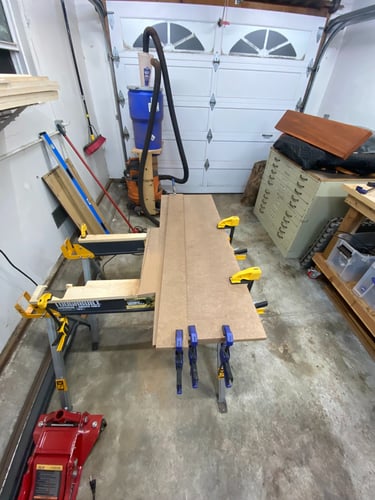
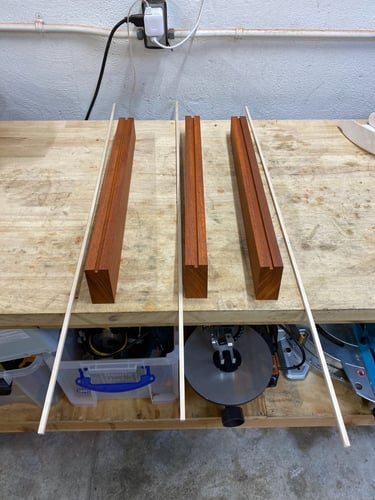
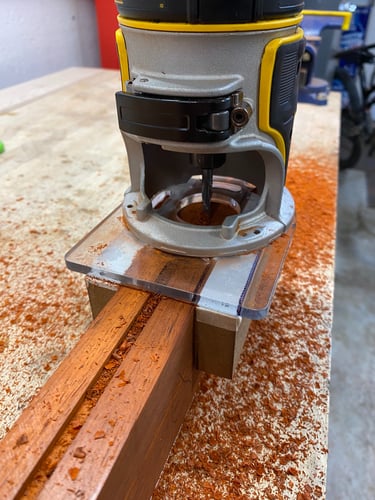
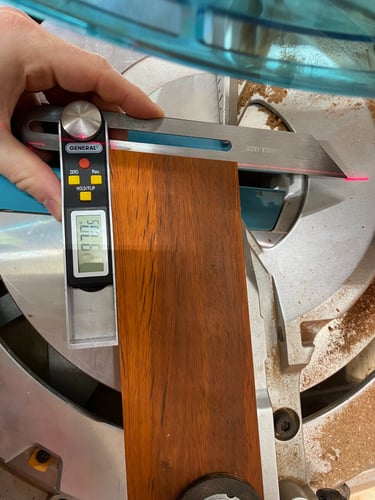
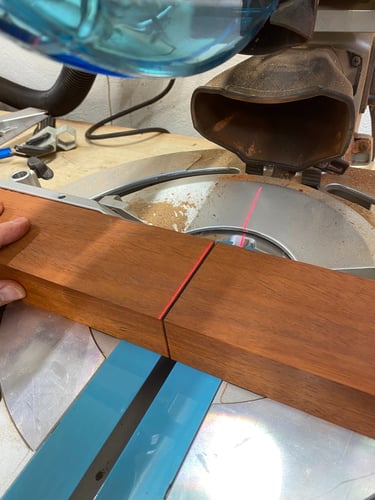
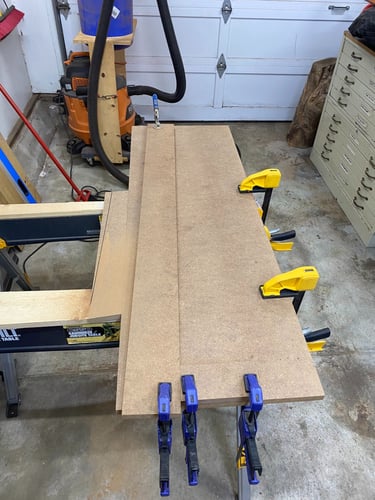
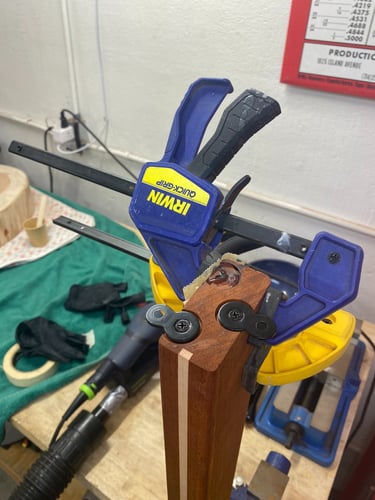
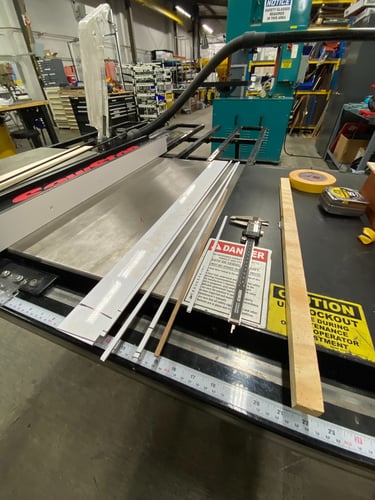
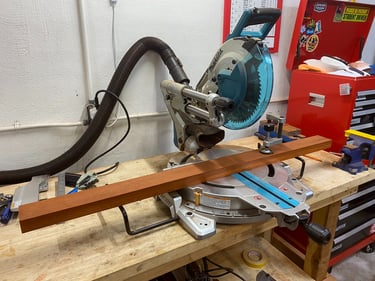
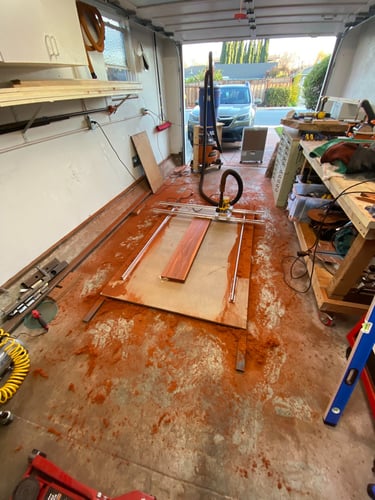
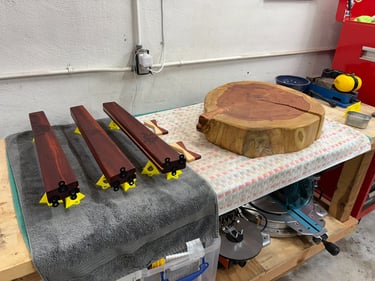
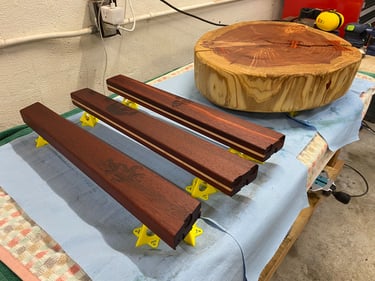
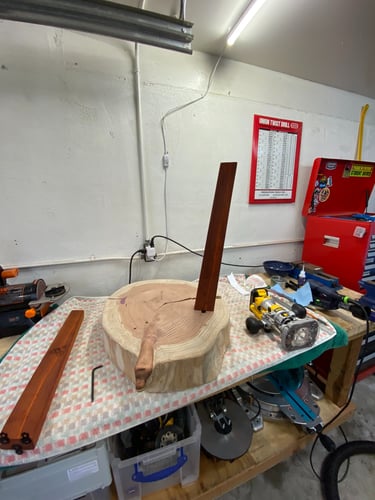
Lets move to the legs - a project in of itself. I am happy to say that I did all of the mill work for the legs in house without any high end specialty tools. Do not get me wrong, I would not mind if I had a planer and jointer - but I do not have much space and need to be very selective with my purchases. I ended up using my router sled as a planer, my router as a jointer, and then my circular saw with an edge jig as my table saw. It took some time, and I had to be extremely careful for each operation (many small spot checks along the way), but it all worked. I think if I were to do this all over again, I would probably end up purchasing Dewalt's lunchbox planer to replace the router sled. It is just way too messy and time consuming on the setup. The router substitute for a real jointer was honestly super easy, quick, and accurate - a jointer is probably the last thing I would purchase after going through this experience. The circular saw with plastic Kreg jig does the job too! But, I do need a table saw...
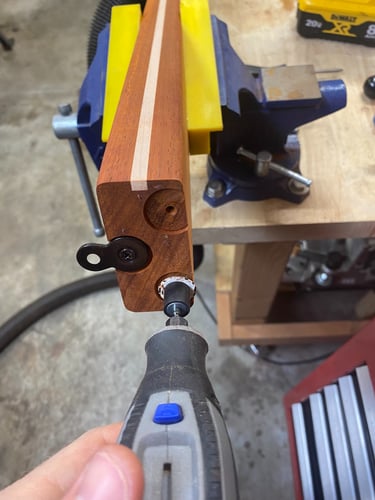
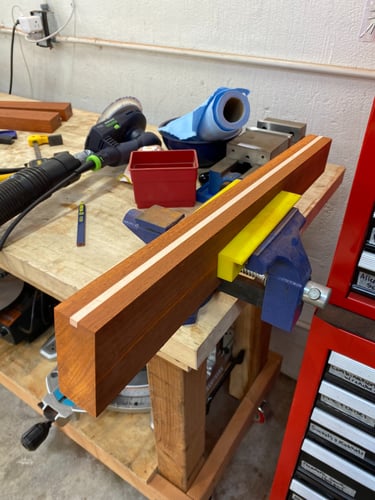
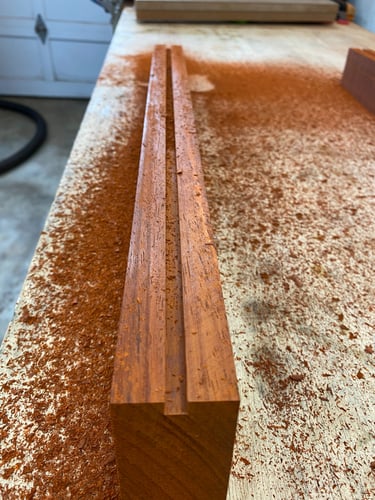
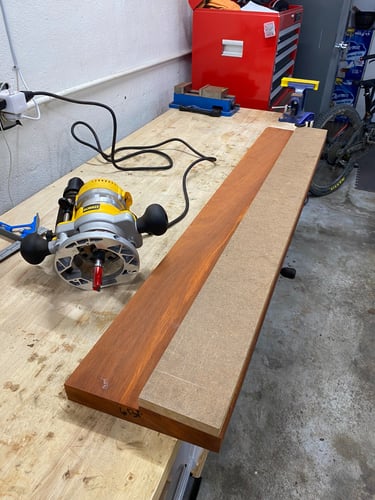
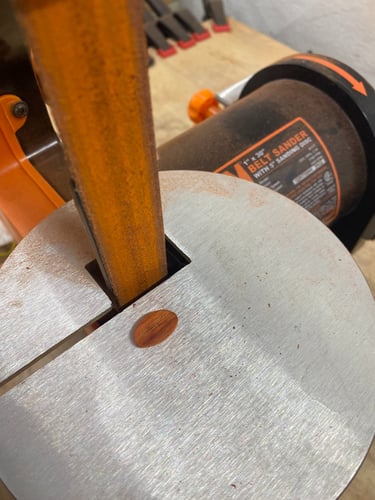
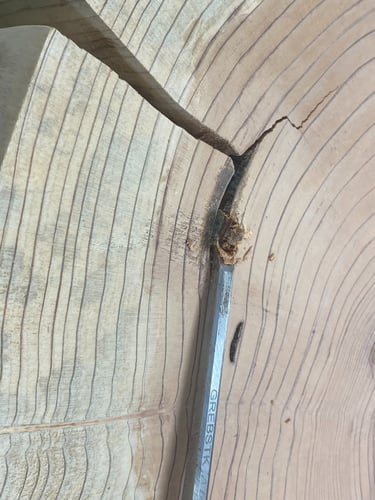
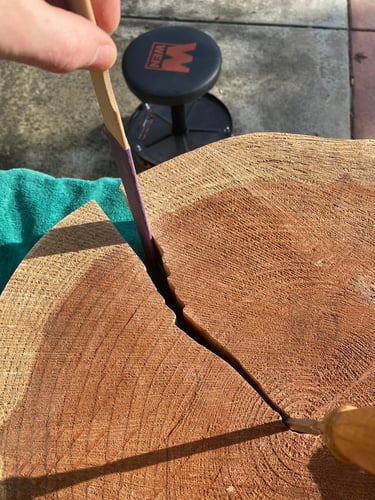
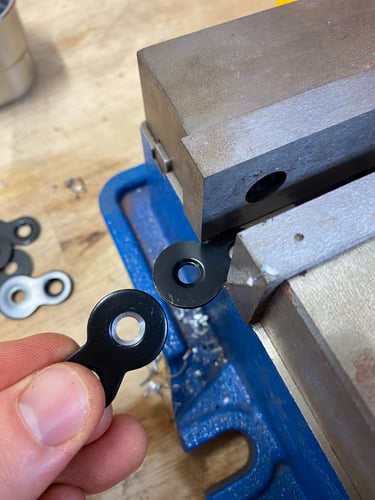
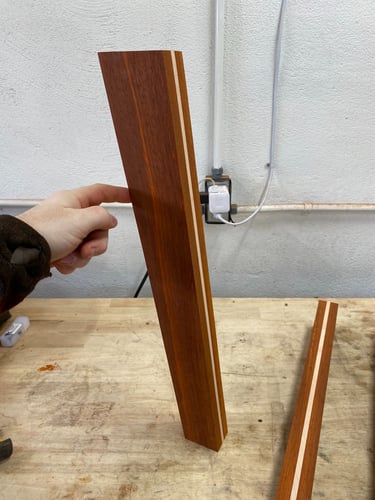
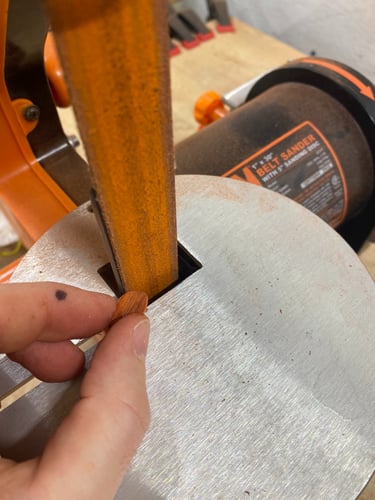
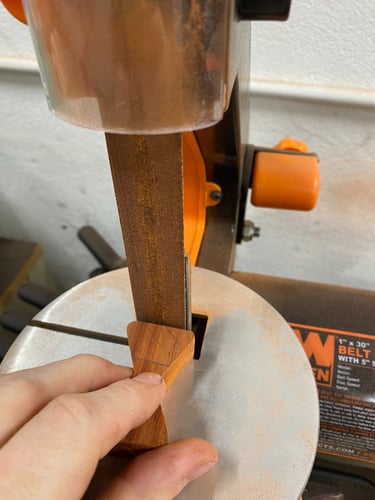
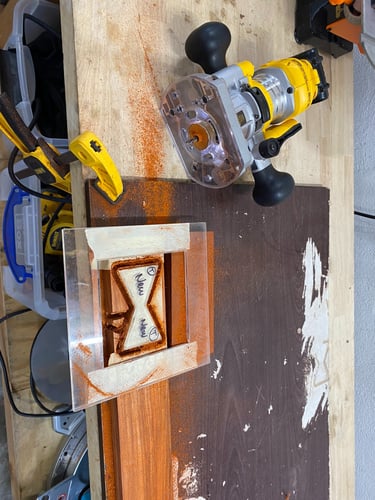
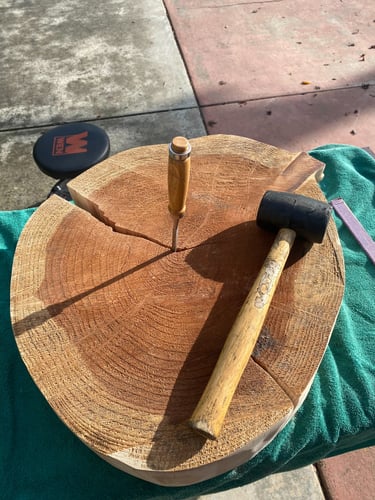
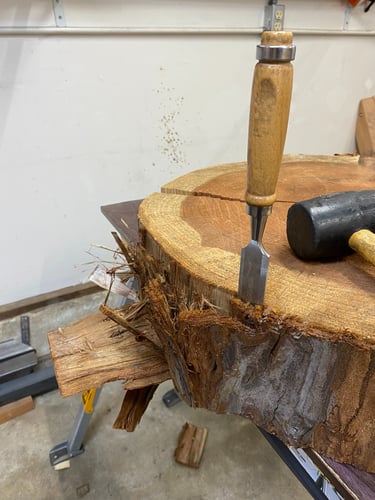
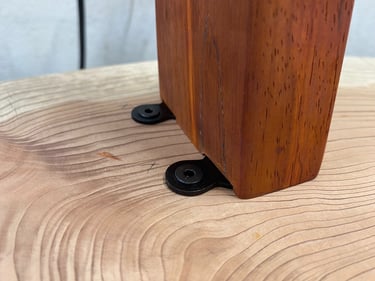
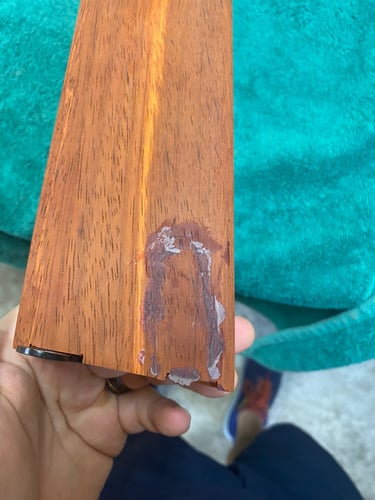
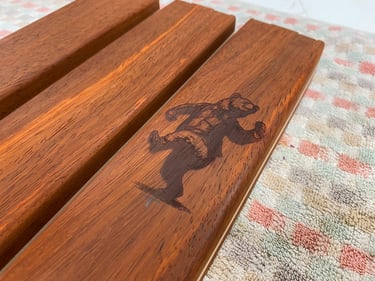
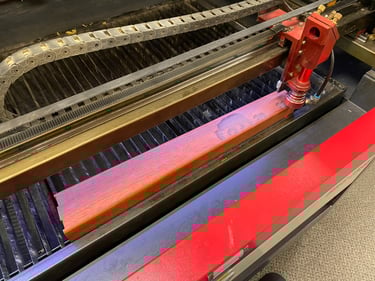
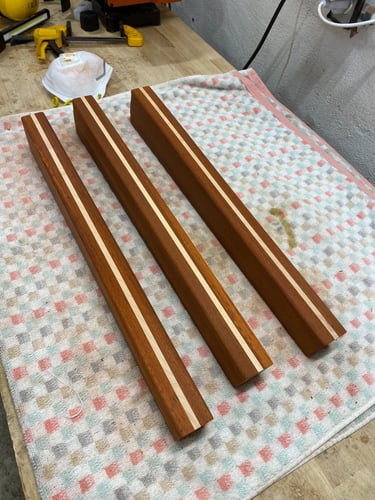
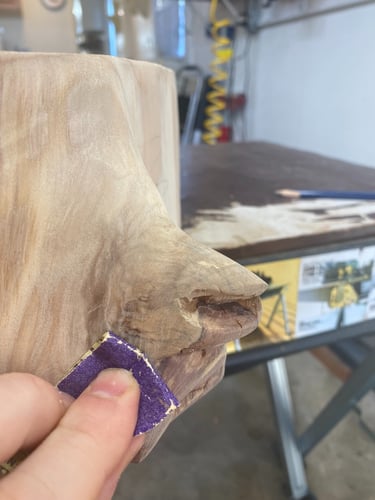
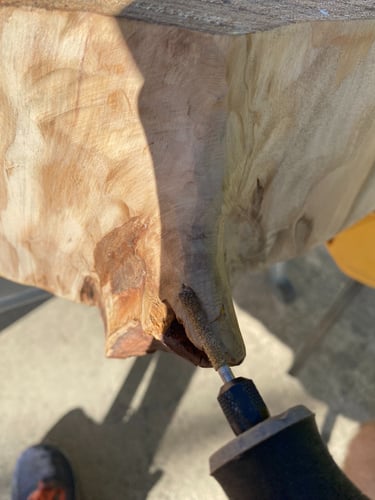
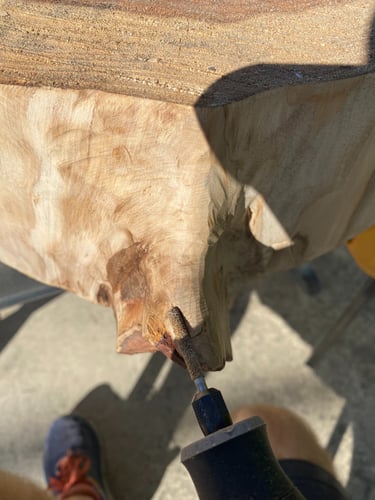
I really liked the slightly tapered look on the first slab so wanted something similar here. But I needed to find a way to introduce some new features. The racing stripe inlay came out near perfectly, and curly maple complimented the lighter shades of redwood extremely well. I hacked together a scrappy jig with my handheld router to mill out a slot, and then started cutting strips of maple on the table saw. A little tap here and there to get just the right snug fit. Laser etching the bears was icing on the cake. My only disappointment with these legs is that I got a very red shade of Padauk, and it turned dark during the finishing process. They look beautiful, but the bear engravings are not as visible anymore. Note to self: get lighter shades of wood for this application! I did have a chunk crack off when mounting one of the figure 8 brackets to a leg, and epoxy was the only thing that would hold it back together. A little reshaping, extra sanding, and some patience got me through.
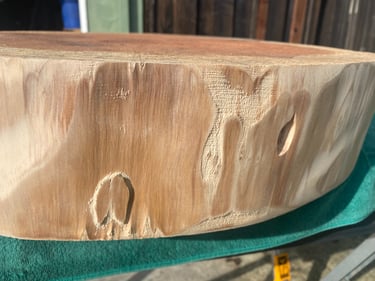
One thing I am particularly proud of is that I did not settle for less on the legs. I had an unfortunate screw up when sanding the mama bear and ended up taking away too much material. Note to self: get your sanding near complete before engraving and/or etch a bit deeper than normal. I tried a few hacks to get it to look better but it did not look right. I was pretty angry, hoping that I did not ruin the whole leg. To top it off, when I did a test assembly of the table with legs for the first time I realized if I had engraved both sides of each leg you would be able to see the bears from any direction - that was a total miss. It was a bummer, but I went back to the laser cutter, took the risk, and added bears to the other sides, and reengraved the mama bear. The end result was night and day - I am glad I went through the process in the end.